Showing posts with label Guide. Show all posts

Thursday, 14 May 2020

Neverwinter Online: Hell Pit - Lazy Rogue Guide

Are you not entertained!?

The Hell Pit event is back as a prologue to the next module episode: the Rage of Bel. Since it seems this is going to happen quite frequently, I thought I'd put a quick guide of how I go through it as a "lazy" rogue. By that I mean my free to play build and gear is nowhere near BiS and while I'm currently at 22k iLevel, the event drops you down to 20k anyway so it shouldn't really matter. I'll just be going through the basics here which is enough for me to get by so, let's get started!

The objective in the Hell Pit is to survive a number of rounds which last 2 minutes each. To be precise 2 minutes of devil or demon mobs endlessly spawning until you can wipe them out when time is over. During the first seven days it is 5 rounds. The next set adds bonus rounds with harder enemies that literally turn most of the ground red and eventually you get boss rounds too. Every round a random power up is dropped into the arena. When invoked they each last 30 seconds (other than the Nuke which is one shot):

-Speed looks like a boot. If you don't have anything better then use it as soon as you get it. Mostly worthless, but it fills up your action points fast for daily power spam.
-HP Regen looks like a heart. Another use ASAP if you have nothing else - don't expect the regen to keep you alive.
-Nuke looks like a skull. More useful than the two above as a crowd cleaner, but takes time to channel and aim. Be in stealth when you use this.
-Invuln* is a shield. It is the best power up and one you should save for the later rounds. Feel free to use it if another shield power up shows up.

*I call it invuln as it certainly makes you feel that way. On the bonus and boss rounds though, it'll help keep you alive but you still need to be on your game.

Required "BYO" Gear: Health stones or health pots. Being lazy I don't dodge everything. If you play the game for long enough (and don't go into dungeons - I'm lazy) it gifts you with enough free health stones to have a decent supply. Health pots are cheap enough with gold but obviously aren't as good. Ideally you always want to heal early - around half health you should be spamming that quickslot heal button. And yes, I mean spam. Lag will sometimes miss a keypress that can lead to your demise. Spamming works just fine as there are cooldowns on all those items preventing you from double drinking.

My basic strategy is: kill the ranged guys. You want to drop your attacks on them or in their vicinity. If your powers are on cool down, feel free to stealth/dodge/run away without attacking to simply heal up until you are ready again. Mobility is key here - you are a fighter plane doing strafing runs. You don't want to get stuck attacking in one spot for too long.

Abilities I use (Executioner path):
Sly Flourish - used sparingly as a finisher, avoided for most of the fight as it roots you in place
Cloud of Steel - ranged "pew pew pew" attack. Useful for attacking at a distance, especially when safe inside a smoke cloud
Smoke Bomb - enemies in it cannot attack, making you safe from most melee guys. Ranged foes can shoot into it though so drop this beside the ranged scum!
Blade Flurry - decent damage to the area around you, best used when mobbed within smoke bomb
Path of Blades - AoE attack that keeps going while you move and/or are stealthed. Perfect as mobility is key.
Shocking Execution - when you want something dead, but I rarely use it in favor of...
Hateful Knives - not the best daily power for rogues but what it has greatly is RANGE. Need to get out of a melee swarm or a sea of dangerous red zones? Target the ranged dude half an arena away and watch as you effectively teleport to him and stomp on his face.

I can teleport to the furthest guy behind the mob of cultists with Hateful Knives.

That's really all there is to my method. I'm sure more "pro" players can do it without using any heals of power ups but this way suits me just fine.

Sunday, 26 August 2018

Sniper Elite 4 - Five Easy Tips

Killing people in the huge and beautiful maps of Sniper Elite 4 is quite entertaining, but for those who are having a tough go at it - here are five easy tips to make your life in Italy better!

#1 - Displace

Unless you are standing straight up, most enemies seem to have very poor vision even on "Authentic" difficulty. This means what they rely most on to find you is the sound of your gunfire. Regardless if you are sniping from far or hosing people down with a machine gun, as soon as you are done - change position. Preferably to a spot where you can see where you just fired from. Some maps have loud sounds that can disguise your gunfire which lowers the need to displace but eventually people will come looking for you, and the AI here is quite good at flanking.

#2 - Crouch

Crouch walk should be your favored position when moving. Enemies are hopeless at seeing you, especially if unalerted. Crouch run is riskier and should be used when you don't really care about stealth anymore. Meanwhile prone crawl is a bit slow for mobility and terrible for aiming at heads that are very close, but it is handy for hiding behind low walls and especially bushes. Enemy soldiers can literally be within arms reach before they know you are there.

#3 - Welrod instead of Melee

If you get up to an enemy soldier (or vice versa), pressing your melee button will instantly kill him. From behind this is silent, from in front less so. If enemies aren't in active combat then you can actually bull rush loners if you so choose, but this should be your last resort. Your Welrod silenced firearm is a much better choice since it lets you better control your position. Just aim for the exposed head (not helmet). Also remember you can throw stones to lure people into better shots.

#4 - Traps

All those lovely toys you pick up aren't just for show. While they are a nice surprise for people pursuing you, they are better used when you find a nice vantage point that you want to hold. Stealthily set up traps on the flanking approaches. Stairs, ladders, doorways and other choke points are the best spots for these. Keep track if they get tripped as they serve as a good indication of when to displace. If they don't get tripped, you can always just pick them up again.

#5 - Binoculars

For some reason you get more experience for scouting ahead with binoculars and tagging everything - people, vehicles, barrels, etc. before shooting at them. More importantly the binoculars actually tell you how far something is so that you can better gauge bullet drop on anything higher than Cadet level. It also pays to look before you engage as things like pill boxes, turrets and idling vehicles might escape your initial notice.

Blaugust Staying Motivated: Been awhile since I posted a guide. What better time to do it than Blaugust eh? :P

Monday, 6 August 2018

Blaugust Topic Idea: Stories and Guides

Stories are a good method of writing practice and lend to being perfect "ammo" to store up in your "prepared posts" list. There are two major downsides to them though and the first is the prep time, especially if this is going to be a multi-post story which is exactly the type I like.

I tend to get creative on game play through stories in particular. This saves some time as you are already given a setting, main plot, and artwork (screenshots) to go with your tale. You just have to make everything cohesive, make some sense and ideally be as interesting as possible. I'm still working on that last part!

The second problem is this is the least read type of post. If you want the high numbers, write guides (as I suggested in the Specialized Skills post).

These also require prep time, not really in the writing because that should be succinct and concise, but in gathering the knowledge for said guide, be it a boss run battle, a cooking recipe, or a how to.

I don't do many of these because of that "someone else has posted it already" syndrome and it doesn't really lend to creative writing, but thanks to Blaugust I'm going to try break that trend.

Saturday, 10 October 2015

Sunset Six: A Gearbox Lesson

[Part of my Sunset Six story.]

Gearboxes are required for mechanized things in game, and they look pretty damn complicated to build especially when your only guide of building one is a weird combination like "Gearbox A250-A350 D140-200 G460-560". Fortunately Balthazarr was free to give me a tutorial at the zFree laboratory on how all this works. First thing to know is that all Gearboxes start at A1 and that position always spins at 100%. By using a variety of gears, you can manipulate the speed of the next gear as shown here:

"Same, faster, slower."

You also need to take into consideration the expenses of building the gears you use - simply put bigger gears are more costly to build. Fortunately all the math for the ratios is already done on the wiki so all you need to do is look through the range you are interested (as defined by the requirement, so A has a range of 250-350) to see which sets will be the cheapest to build. The 5/3 numbers on the side there are the number of teeth per gear to achieve that speed with five being medium and three being small.

For this range, the cheapest to build would be A333 D167 G463.

This means that we want A8 rotating at 333%, D8 rotating at 167% and G8 rotating at 463%. To get to that top line, you simply need to make a snake of gears up to the desired spot like so:

Since the gears are all the same size, D8 is spinning at 100%.

That's nowhere near strong enough, which is where using the 5/3 gear combos help to boost it up. Also, the gears can be multi-levelled so you can have a big one right above a small one or one on top of a "spacer" for example. Ultimately the final box of A333 D167 G463, which obeys the initial range of "Gearbox A250-A350 D140-200 G460-560", looks like this:

Thanks for the lesson Balthazarr! :)

Just FYI - It's worse IRL. :P

Sunday, 17 May 2015

Today I Smiled: Live Action!

Been awhile since my last "Today I Smiled" entry and there sure are a lot of things for me to smile about. My Neverwinter Online: Vigilance Guide got featured as a "Bag of Tricks" entry on NWO-uncensored. I also quite like that the Wizards of the Coast release content on all mediums simultaneously which means that Elemental Evil is also hitting DDO and the table top game, meaning there are write ups for each of the evil cults.


The Newbie Blogger Initiative is also going full swing and this year I'm in charge of the Poetry Slam - looking forward to more entries coming in before the end of the month. Also happy to report I'm now up to 100 links from 59 when the event began. As a fan of the TV series Arrow and the Flash I'm also looking forward to Legends of Tomorrow, and am hoping the live action version of Shingeki no Kyoujin (Attack on Titan) does well. Kinda surprised to see a live action Parasyte there too!

If none of those interest you then perhaps this clip of Guildwars 2 killing, deleting and then banning a cheater will be enough to brighten your day, or if you want a more hands-on experience, try out the first two browser bragging games for this years NBI: the PvP blob consuming game called Agar and the colorful pixel gore of Critical Annihilation. :)

Friday, 15 May 2015

NBI 2015: How to avoid becoming Dormant

I dislike having "dormant", non-updating blogs on my blog roll. While it's true that my personal restrictions of "if you don't post in 3 weeks you get culled," on this matter are likely heavier than any other blog (I'm letting it slide for this NBI month) - I thought that I'd give some advice on how not to go "dormant" in the first place.

On those possibly rare occasions when you do feel like sitting down and just typing up a storm, put on some instrumental-only tunes and...

TYPE YOUR HEART OUT.

Personally all my posts now spawn in a notepad document before going anywhere near the internet. When I feel like typing, I find this method works best since there's no logging into a site, no needing a network connection or formatting issues to worry about just yet. All that matters are the words.

Sometimes I get an idea to type about something else so I separate out a section which serves as a possible title for a future post. For me, my "possible new content" goes above all the other stuff I've already typed about or am currently typing about (it's an organization thing). Don't forget to save and store a backup of this file regularly - doing so covers your bases as Contains Moderate Peril discusses in his blog backup post.

The idea is that it allows you to type out more than a single post in one sitting, but DO NOT post more than one or two a day. This eventually gives you a backlog of stuff. As an example, if all goes according to plan when this particular post goes up then I would have a backlog of around 30 posts waiting to go.

That's potentially 30 days (if I was a daily poster) of me slacking off from typing anything and more than enough time to recharge my batteries, as it were, for another type session in between. Imagine how much that can stretch out if I only posted 3 times a week? They don't even have to be superb quality or long posts - just something to keep the site "alive".

When you also realize that you can automatically schedule blog posts to post themselves, you can then do amazing stuff like continuing to post while you are actually away on vacation without any internet access (which I did earlier this year).

Be like Batman. Preparation is the key.

There is a small caveat here though: You should know which posts are time sensitive and act accordingly. For instance it wouldn't make any sense if I posted this after the NBI is already finished. Just use common sense and you should be alright.

Other on-going NBI activities:

Join the NBI 2015: Poetry Slam!
Browser Boasting Week 2: Critical Annihilation
Contains Moderate Peril still looking for NBI guest posts!
Talkback Topic #2: Early Access and Kickstarter
Murf's Screenshot Safari
Gaming Discussion
Jeromai's Writing Prompt: Screenshots of Non-Existent Things

Tuesday, 5 May 2015

Neverwinter Online: Spinward Rise Vigilance Guide

[Part of my Neverwinter Online: Vigilance Quest Guide.]

Welcome to the final zone of Elemental Evil! It is actually more travel friendly than all the previous zones as you unlock each island, however it can also be brutal in the way of combat, especially on the last island. Like before, be careful of pure melee groups of enemies. While it is easy to tell if a bunch of cultists are skirmishers, it is a little less obvious for air archons. Simply count the number of bows / blades they carry to know what to expect.

The repeating quest here is "Howling Hatred". Don't go out of your way to complete that until you reach the second island. There are also jumping puzzles (yay!) which are the easiest tasks to complete on each island. Basically you just have to find the correct jump point and then press and hold space bar while moving forward. If those big chunks of rock can fly through the air, why can't you?

Once at the top, you can either jump back the way you came or simply "fall" down. If you dodge just before hitting the ground, all your vertical momentum is halted and you take zero falling damage. Neat trick huh?

Last thing of note is a personal one here. I didn't go into -any- instanced dungeon as I felt there was enough to do top side so I can't give you any tips for those this time (other than don't go alone). At least it makes it exciting for you right? ;P

No point in changing the color coding now:

Green - Easy and/or fast.
Pink - If there's nothing else to do.
Red - Better to take a break than do these solo.

AVIA LANDING

The first island introduces you to Kenku, Axebeaks, Owlbears and jumping puzzles! Unlike the cramped confines of the Fiery Pit, it's pretty safe to wander around here. There are two entries to the cult barracks, and the Western one next to the Kenku camp is less defended. You can also go in with style by jumping in from a glider tower.

*Harper Evandriel
  • Tome of Air - Jumping Puzzle! Starts at the tall western glider tower.
  • Learning to Fly - Collect 12 "flight" supplies from Glider towers (drops and pickup), kill 40 cultists
  • Air Cult Assault - HE Encounter Silver - self completes sometimes. Odds of getting help to complete is high.
  • Elemental Assault - HE Encounter Silver - self completes sometimes. Odds of getting help to complete is medium.
  • Air Supply  - Sabotage supplies 6 then 6 airships. Lots of Fighting.
  • Twin Breezes - Raid air cult barracks instance

*Skreel Swiftwing
  • Birds of a Feather - Rescue 6 kenku eggs. All guarded. Pickup.
  • Shiny Metal - collect 10 weapons from kenku (pickup from camp barrels and drop), kill 30
  • Kenku - defeat 40 kenku (goes well with two above)
  • Fight the Wind - defeat air archons in barracks instance

*Pirri The Swift
  • Target - Blackfeather - miniboss kenku. Kill fast as a kenku spawn lives right outside his cave.
  • Target - North Wind - miniboss hurricaine cultist. Kill fast he appears next to a large group of cultists.

*Brokar Ironshod
  • Flightless Fury - kill 15 axebeaks, 5 owlbears (doesn't mix well with any other quest)
  • Lesser Air Runes - Available after your first 16 tasks, mandatory to open teleporter to next island.

WINDCALL TEMPLE

The second island is home to the rather safe cultist binding workshops, and the more dangerous air elemental summoning portals and altar of Yan-C-Bin. The encounters are a little stacked at Yan-C-Bin's place so expect multiple groups during combat there. Fortunately you should only need to do that a few times.

*Harper Evandriel
  • Greater Tome of Air - jumping puzzle! Starts from the only glider tower near the workshops!
  • Clearing the Air - add incense to 5 shrines at Yan-C-Bin's altar
  • Air Cult Assault - HE Silver - self completes sometimes. Low chance for players to assist.
  • Elemental Assault - HE Silver - self completes sometimes. Low chance for players to assist. 
  • Slaad Summoner - Kill the summoner in the Howling Maw instance

*Skreel Swiftwing
  • Order out of Chaos - Gather 15 Slaad control gems from cultists (drops). Can get them from Avia landing - easier fights = faster
  • Fiends of Limbo - Kill 40 Slaad at the pool of chaos. Slow to kill, doesn't even count if not in pool. Stupid.
  • Feeding the Slaadi - free sacrificial victims in Howling maw instance
*Pirri the Swift
  • Target - Windshear - Miniboss air archon - spawns near campfire. Kill fast to avoid archon respawn.
  • Target - Glark the Rancid - miniboss death slaad. Tough fight: Hardest of these mini boss assassinations. Expect to continuously evade moving AoE "monster" while fighting him.
*Druid Okobo
  • Unbound Anger - release 5 air eles. Easy, you only have to fight cultists to do so.
  • Windbreaker - disrupt 5 air ele portals. All guarded.
  • Archon Anarchy - kill 35 air archons (goes well with above)

*Brokar Ironshod
  • Greater Wind Runes - Available after you finish 16 of this set to unlock teleporter to the final island.

THUNDERHEAD REACH

The final and most dangerous island is home to Cloud Giants who are rather adept at defeating adventurers since they never come alone. You'll get a "Scrying the Skies" mandatory quest to look through four telescopes which doesn't count to your Vigilance Quests but does give you a good idea of how the last island is laid out. The instanced dungeon here is Nimbus Tower which is probably where the Air Prophet is, but after hearing it takes 40 minutes to clear solo I opted to just leave it alone.

*Harper Evandriel
  • Grand Tome of Air - jumping puzzle! Starts from low broken tower next to two giants.
  • Eyes in the Sky - gather 6 intel reports from cultists (Farm at Avia)
  • War Chests - recover 12 war chest treasures (pickup, often guarded by cultists)
  • Whispers on the Wind - collect 10 messages from cultists. (drops at a low rate. Best farmed at Avia)
  • Air Cult Assault - HE Encounter. Very tough.
  • Elemental Assault - HE Encounter. Very tough.
  • Tempest in a Bottle - stop rituals in the Nimbus tower instance

*Skreel Swiftwing
  • Giantslayer - kill 8 cloud giants. Good news: they mostly come in pairs. Bad news: they mostly come in pairs.
  • The Cloud Forges - kill 4 cloud giant smiths. Usually come with air archons.

*Druid Okobo
  • Archon Anarchy - slay 40 archons at Thunderhead Reach.
  • Lofty Ideas - collect 5 air magic scrolls from cloud giants (drops)
  • Cloud Magic - collect air magic lore and win Nimbus Tower instance

*Pirri the Swift
  • Target - Rastari - kill cloud giant miniboss, the easiest cloud giant to kill since he comes alone!
  • Target - Grackel - kill owlbear miniboss, hits hard with no telegraph. Good practice of controlling AI, has no nearby allies.

Once that is done you just need to collect the Seed of Air, which might look like it's guarded by a giant and a bunch of air archons but if you dash along the left side and go all the way to the edge of the cliff they ignore you long enough for you to collect the seed and get out of there. Once that's done, congratulations - you have finished Elemental Evil! Enjoy your new artifact weapon. Don't forget that if you hit level 70, you can get an off hand artifact weapon too. See Sgt. Knox.. :)

Monday, 4 May 2015

Neverwinter Online: Fiery Pit Vigilance Guide

[Part of my Neverwinter Online: Vigilance Quest Guide.]

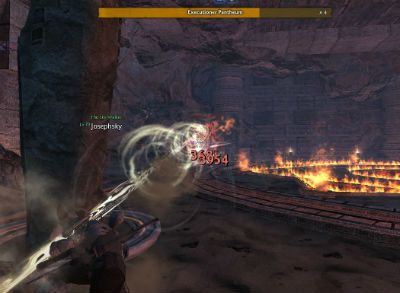
This is the part where I remind you to spend those perk and power points you have accumulated, because the Fiery Pit is one dangerous place. Not only do enemies spawn pretty close to each other, which is annoying when going after mini bosses, but sometimes they spawn as SILVER enemies. Be sure to look before you leap! Also, the way the map is structured is that there is only one camp right at the start. This means there is a lot of travel time added on as your quests lead you deeper in.

The map is connected by central bridges patrolled by fire giants. You can avoid them by timing your crossing. Wait at the 90 degree angle of the bridge and just as the giant is about to step out, rush past and hop on the railing closest to you. The idea is to break his line of sight so he loses aggro. Alternatively just kill the giant.

Each area also has a "Making the Rounds" quest which you should take for extra XP. In the second and third areas, try ensure this task is completed before returning to base. Be especially careful about large groups of melee guys. If 5 skirmishers hit you it's most likely lights out. Use crowd control early to gain the initiative.

Lastly, you get a short quiz right at the beginning for some extra XP. While it's worth reading the lore, here's a quick recap that should get you by:

The Fire Cult is the enemy here, trying to awaken Maegera. The good guys, helping descendants of Delzoun who curiously called for outside help, have almost won and control half of city [fun fact: the other half of the city looks exactly the same] but due to low supplies need adventurers to finish off this war. Duergar are present too but are attacking everyone.

As usual, the color coding remains the same:

Green - Easy and/or fast.
Pink - If there's nothing else to do.
Red - Better to take a break than do these solo.

FIRST PATROL

Your first patrol mainly deals with the North East and South East parts of the map. Keeping this in mind, collect quests for the one spot to complete them faster and stop by the camp to resupply / sell / juggle quests every time you switch from one to the other. The Excavated Tomb is the instanced dungeon here but I recommend skipping it entirely as you'll almost always have something else to do topside.

*Grogbi Ironbeard
  • Burning Sensations - collect bloodburn scorpion venom 5 kills NOT pickup (North)
  • Connecting the Dots - investigate suspicious bodies (North)
  • Geyser Samples - collect geyser samples (North. Do not attempt if Emberclaw is awake.)
  • Mushroom Medic - collect 16 shrooms (North, mostly guarded by duergar)
  • The Missing Spy - collect duergar runes (South pickup - points marked)
  • Hostile Neighbors - defeat duergar 40 (North)
  • Orders for Destruction - kill demolitionists and get orders (North AND South)
  • Target: Olgi Fren'rah - Duergar Theurge miniboss (North) - expect nearby demolisionist team(s) to attack.

*Horath Pegra
  • Crystal Coercion - Collect 18 pickup Bloodiron Crystals (South)
  • Quell Hounds - kill 25 hellhounds (South)
  • Traitorous Scum - Kill Duergar traitors (south)
  • Target: Irestund - Fire Giant miniboss (South) - expect nearby Hellhounds to attack.
  • Rescuing the Spy - rescue people from Excavated Tomb instance (South)
  • Water Brigade - steal water barrels from Excavated Tomb (South)

SECOND PATROL

Your next tasks will be found on the Center and South areas of the map. The Burning Heart instance is the dungeon here, but again I recommend skipping. Enough to do top side. Or, use the time to take a break from all the intense fighting! Go have some cookies or milk or something! If the player is tired, you won't be as effective! :P

There's also a scavanger hunt quest here called "Services Rendered" to collect 25 mithril ingots. It can be annoying at first if you don't know where they are, but goes rather fast when you do. You can also switch channels to get ingots from places you've already visited. Look for them under wagons, in corners, on staircase bannisters, on the roof, ledges, anywhere and everywhere in the center you can jump to is fair game. To get you started here are nine of them, starting from the great hall directly across the camp.

1) Next to Center Throne
2) from Throne turn left, behind pillar
3) from Throne turn right, behind some curtains
4) from Throne turn around, under bench (probably first one you will pick up)
5) on long rod thing above the fire pit
6) South side staircase from great hall: nook in the wall
7) South side staircase from great hall: two along the left side (easy to spot)
8) North side staircase from great hall: On the south railing of a giant's bridge
9) North side staircase from great hall: On a pillar near #8. Just look down stairs and to the left.

*Farah Dahl
  • Hot to Handle - collect 4 fire archon armor and dump them into wells. (South, lots of Archons near the wells)
  • Snuff Out the Flames - kill 45 fire archons (Any, but I suggest South.)
  • Tactical Ventilation - close 6 vents at the forge. (South)
  • Target: Singe  - Fire Archon Ash disciple miniboss. (South) - expect nearby archons to attack.
  • Torch Bearer - collect 12 iron torches from cultists (South and Center). Middling drop rate.
  • Contained Explosion - Silver HE: Rocks fall. (Center)
  • The Burning Heart - Burning Heart Instance
  • What the Blazes? - extinguish elemental blazes in Burning Heart instance

*Thannis Beke
  • The Searing Sentinels - defeat 5 fire giant guards. Evade well. (Center)
  • Spiker Striker - kill 10 flame spikers. (Any)
  • Target: Flamberge - flame spiker mini boss (Center) - expect cultist group to attack
  • Controlled Burn - collect scrolls / element cores + burn 5 (Center, lowish drop rate).
  • Services Rendered  - collect 25 mithril ingots. Pickup. See above. (Center)
  • Trial By Fire - Take damage from fire archons (40 atks w/o death) - Requires patience. Ideally use the first archon you see just outside camp so you can hand this back in when done.

THIRD PATROL

Your final patrol deals with the North West and South West zones, as well as the West center. Unlike before, it doesn't really matter which zones the quests lead to as you will be visiting all those areas if you are going for the extra XP from "Making the Rounds". An easy highway to the North West exists where you just have to cross one bridge north, then follow the path West all the way, avoiding the patrolling bridge giants.

The instanced dungeon here is the Cistern, and in it you will encounter Vanifer, the flame prophet. Unlike the last two fools she is quite capable of killing you on her own, behaving much like an Ash Disciple. Her area attacks are extremely dangerous and failure to evade or block will probably result in death. She also starts with a bodyguard (take him out fast, but cleanly) and summons more adds as she takes damage. Due to this I highly advise luring her out of her chamber and using the whole rest of the dungeon space to fight her. I also recommend using single big hits for this fight, instead of swinging blades continuously so that you can concentrate more on evading.

Eventually, she will run away. :P

*Lucas Shaneway III
  • Barrier to Entry - seal doors with magic barriers 6 (South West)
  • Slaves to Business - rescue 8 dwarf slaves (South West)
  • Cache on Delivery - dig up 8 caches. Marked. (South West)
  • Financial Tracking - plant 10 magic coins. Marked (West Center)
  • Pillage First - kill 30 cultists (Any)
  • Target: Nuria Pyrellis - cultist flamewrath miniboss (South West) - if using ranged, can be fought without aggroing nearby cultists.

*Captain Montrose
  • The Plumbing Job - fix 12 pipes at water pumps (all guarded, North West)
  • Sabotage - defeat cultist saboteurs (North West, goes well with above)
  • Brute Squad - defeat magma brutes (North West)
  • Saddle Down - collect 10 fire strider saddles. Drops 100% from Strider Riders. (North West)
  • Target: Captain Felcrest - miniboss fire strider. Many mobs nearby and he runs around a lot. (North West)
  • The Cistern - fight Vanifer in Cistern instance
  • Ring of Fire - Vanifer's ally in Cistern instance (then Vanifer herself)

Once that is all done the last thing to do is to pick up the Seed of Fire, guarded by a few measly archons at the wells. You shouldn't need help beating them up to reach your objective, and if you are lucky someone might already be there just hunting fire archons anyway.

Sunday, 3 May 2015

Neverwinter Online: Reclamation Rock Vigilance Guide

[Part of my Neverwinter Online: Vigilance Quest Guide.]

Reclamation Rock is home to very dangerous bulettes, but it also has the easiest starting area of all the zones to complete. Personally, I've been using it as extra XP for my characters who already have finished the campaign. This guide will be using the same color coding as last time.

Green - Easy and/or fast.
Pink - If there's nothing else to do.
Red - Better to take a break than do these solo.

BEACH CAMP

My favorite spot as it gives easy access to quest givers and to traveling back out to the world map. The instanced dungeon here is the Crypt of Ascension, and if you do decide to go in there you will find the entrance behind an illusionary rock face. Make sure you have both quests to make the trip more worthwhile if you do attempt it.

*Dassar Truebow
  • Adepts of Ascension - rescue acolytes    
  • Scouting Ascension - kill enemy scouts   
*Imbross Irri'karr
  • Black Earth Survey - investigate / disrupt training camps   
  • Cult Infiltrators - talk to infiltrators (usually on ground level)
  • Stealing Their Mettle - steal cult weapons
  • Scouting the Forest - talk to ranger scouts (usually on higher ground)
  • The Heroic Way - complete HE, rescue merchant
  • Tombs of the Watchful - Visit 5 tombs (open world) fight inhabitants, interact with something.
*Baram Hannikar
  • H1 - Heroics - As of this post, currently bugged and finishes by itself: Free XP.
  • Deployment Orders - get orders (pickup or mobs)   
  • Training Manuals - get training manuals    (pickup or mobs)
  • Cult Connection - gather journals from cultists (goes well with below)
  • Fighting the Earth - kill Rock Claws (the West cultist camp has 7 in the vicinity)
  • Grinding the Gravel - kill mercs and throwers  Leading the Avalanche - kill elementals (doesn't really mesh with any other quest)   

CITY CAMP

Ah the city. The grind of this zone begins now. Fortunately there is a secret tunnel (near one of the scouts) that leads up to the tavern to save travel time. There's also a new secret tunnel that leads from the cathedral to Scar Keep. From inside the cathedral if you are facing the doors, turn right and look for stairs down. The instanced dungeon here is the Underlift, and because the quest selection here is so poor I actually do recommend going in there (with 2 quests) to save time. The crazy bomb throwing dwarf boss in there isn't too bad. Just kill the adds and you will win. I sure hope you know how to tell the difference between a mimic and a treasure chest though (cursor has bag = regular chest).

*Brother Satarin (Cathedral)
  • Posting the Truth - put up posters. If contested by other players, switch channel.
  • Warding off Madness - gather materials to reinforce wards (tainted water x4/archon dust x4)
  • Holding the Streets  - draw out cultists on street. Use corners for cover or leave quest circle if hard pressed.
  • Rocky Foundations - kill 40 earth elementals. Not too bad since the marked zone has around 20. Archons count.
  • Rock Tumbler - kill galeb duhr. (Rare to find in the area, especially if contested)
  • Voices of Stone - kill 10 blackmantle sorcerers (more rare than above, even with the new summoning scrolls)
*Councilman Graves (Cathedral)
  • Rescue Mission - rescue workers from Underlift
  • The Verge of Collapse - stop bombs in Underlift
*Hedgewizard Nottin - (Scar Keep)
  • Hedging against Plague - not a vigilance quest (doesn't take up a slot), but good for bonus XP. Collect notes from cultists (100).
  • Call to Alms - collect alms (drops anywhere and pickup from zone) then hand them out
  • Recovering Reconstruction  - collect construction supplies (drop / pickup) and rebuild
  • Hero of the City- complete ANY HE (good combo with below)
  • Shaking up the Town  - complete Earthquake HE - High odds of others doing this as it is right outside the cathedral. If currently active, try get this and Hero of the City to complete both.
  • Hostile Induction - Complete Press Gang HE - can be difficult without aid or sniping from cliff top.

MEMORIAL FIELDS

The most annoying area of all the zones purely because of it's crappy quest choices and tough or rare opponents. Expect to be here awhile. The instanced dungeon here is the Lost Tomb which happens to be where the Earth Prophet, Markos Unrayle is encountered. He has a pretty big room to fight in but isn't that much of a threat. Kill his adds while fighting (so kill him slowly) or lure him near the entry so you can murder him with ease. Because of the low quest choices here, I do recommend visiting this at least once (with two quests).

There are also Slaad (frog men) present who are numerous and pretty annoying to fight (long to kill/use up too much resources), so I try to avoid them.

*Captain Dunfield
  • Black Earth, Stone Heart - stop ceremonies in Lost Tomb
  • Stay of Execution - rescue captives from Lost Tomb
*Captain Lynn
  • Stone by Stone - Kill 3 Blackmantle Generals. All are casters. Not all are equally defended. Choose targets wisely.
  • By the Horns - hunt 6 gorgons. Slightly rare, one in Graveyard and one next to graveyard. Alternate as they respawn or channel hop.
  • Landshark - hunt 8 bulettes. Easy to find, but very dangerous.
  • Defying the Rock - HE Encounter. Very tough to win. Concentrate on the non-silver/golds on the wings to up the kill count quickly. Better odds for randoms to assist than the HE below.
  • Bannermen Forever! - Raise banner to spawn a Silver HE. Defend.
  • Taking Measures - take 500k damage and live. 15 min limit to complete. As a rogue and ranger I couldn't do this. Might be ideal for Cleric / Pally.
*Brother Theodosian
  • In Memorial - Check on Graves - Easy.
  • Stolen Memories - collect mementos (drops). Good combo with Defying the Rock.
  • Memorial Heroes - complete grave robber Silver HE. - Soloable but be careful.
  • Toad Bait - Close Slaad Limbo Portals. Often contested by other players. Best right AFTER the Slaad invasion event finishes.
  • Toadkiller - Kill Slaad, can find many to the East along the outer cliff.

Once that is all done, you just have to pick up the Earth seed and are finished with this area. That might be a little challenging though as one of the Blackmantle Generals sits right on top of it with two or three groups of lackeys. Get a buddy to help you clear it out or channel hop to find one that has recently been cleaned out. If you skipped the last part of Drowned Shore like I suggested, it is time to go back there and curb stomp everything.

Friday, 1 May 2015

Neverwinter Online: Drowned Shore Vigilance Guide

[Part of my Neverwinter Online: Vigilance Quest Guide.]

Welcome to the Drowned shore. There is a repeating quest here called "Gutting Fish" from the Zhentarim Agents which you should always get for bonus XP. You'll complete it a few times while doing the vigilance tasks. I'll be using colors to indicate what quests should be prioritized and which should be avoided.

Green - Easy and/or fast.
Pink - If there's nothing else to do.
Red - Better to take a break than do these solo.

ENTRY CAMP

Main thing to note here are the mines. Glimmerstone is filled with lizardmen and some sea hags. Silverdrip is filled with sea trolls and many sea hags. These two are "open world" dungeons in that other people can just enter your same instance. The main trick here is to coordinate your tasks when you go in one or the other. Goldseeker's Folly is the INSTANCED dungeon, which means you will not get randoms helping you out. Don't go in there unless you either have both quests for that area and/or have the mandatory task after you've completed your first 16.

*Alinda Greenwood
  • Riptide Molly - Sea Hag miniboss wandering outside the mines
  • Healing Harvest - gather vine blooms and shrooms (shrooms from the mines)
  • Herbal Malady - Collect Gurglewort Sap, add it to Humanoid food crates in Glimmerstone or Silverdrip
  • Alinda's Bounty - Collect Olhydra's Emblems (drops)
  • Mysterious Symbol - find symbol (drop) check it against book
  • Sea Hag Slaying - kill sea hags
  • Heroic Encounter: Breaking the Ice
*Udo Stonekin
  • Deepclaw - sea troll miniboss in Silverdrip mine
  • Needful Things - Supply crates from Silverdrip or Glimmerstone
  • Silver Strike - get silver ore from Silverdrip
  • Sea Trolling - Kill sea trolls
  • Goldseeker's Folly: Mine Rescue - rescue miners
*Bellan Norell
  • War Machines: Destroy 3 war machines at nearby keep
  • The Tidemaster - boss in Glimmerstone
  • Reptillian Reavers: Hunt Lizardmen
  • Shock Troops - kill trolls in Silverdrip AND lizardfolk in Glimmerstone (only in the mines)
  • Heroic Encounter: Ranger Rescue - at nearby ruined fort
  • Goldseeker's Folly: Rogues Gallery - kill minibosses in the mine
  • Heroic Encounter: Subterrenan Surge - Gold level Heroic, tucked away in a dungeon

HILL CAMP

The most efficient way to clear this part I found was to AVOID THE KEEP in the Northeast of the map as there's a lot of pointless and dangerous fighting in there. After completing your 16 tasks here you will get a mandatory quest to raid it anyway. Ideally bring the two Sea Hag's Hold quests when you do make the trip to maximize your time there. Be careful of a lizardman ambush at the pool part of that instanced dungeon too.

Most of the tasks here involve killing lacedons and hags, or collecting merchant goods. ALL of these can be found near the camp. Collect merchant goods from the cultist camp just to the right of the Hill camp (stand at the fire at face the road). Ten steps and you are there.

*Xalliana
  • The Render - lacedon boss
  • Undead from the Deep - lacedons
  • Drowned Menace - kill lacedons
  • Green-Eyed Monsters - get a hag eye
  • Attack on Blackdagger Keep - kill enemies, destroy supplies at the keep.
  • Heroic Encounter: Pillaging the Pillagers - HE located deep in the keep.
*Ranolf Kemp
  • High Road Warning - post signs
  • Getting Goods - recover trade goods from monsters (use the nearby cultist camp)
  • Taking Stock - recover merchant wares (from keep OR mobs, use the nearby cultist camp)
  • Heroic Encounter: Merchants in Distress
  • Crushing the Crushing Wave - slay cultists
  • Maelstrom - mini boss cultist in keep area
*Lanric
  • Hateful Horrors - kill green hags
  • Heroic Encounter: Cultist Ambush (very near the camp, high chance for assists)
  • Ranger Reports - gather reports
  • Scaly Persuasion - kill cult agitators
  • Life Guarding - free captives (found in watery lacedon areas)
  • Mossy Meg - hag boss just outside the keep
  • Sea Hag's Hold: Down the Drain - drain pool
  • Sea Hag's Hold: Worse Than Death - free captives

After you have finished these and the mandatory quest I suggest you go to Reclamation Rock and do the quests there, coming back afterwards to do the final area with better gear and feats for an easier time. Your call though.

SEA ELF CAMP

The main problem here is that most of the quests lead across the map to the beach, wasting a bit of time on travel. Make sure that the four quests you pick up are completed before coming back. The Inn tasks on the other hand, are right beside the camp. If you do those, complete them and hand them in / pick up replacements before going to the beach. A word of warning with the Inn - on the main level, enemies from upstairs can and will aggro you so expect to fight more than one enemy group when you get there.

*Guard Harris
  • False Priests - kill cultists in Inn (careful once you exit the basement)
  • Avenging the Guard - kill cultists (30)
  • Beach Combing - collect salvage (pick up)
  • A Seafood Diet - collect crab meat (10 drops - not all crabs have meat though), eel grass (pickup 5)
  • Slade the Thricedrowned - miniboss cultist
  • Stolen Memories - recover mementos (drops x5) Abysmal drop rate.
*Iolas
  • Breathless - recover necklace of air breathing (drop x1) Slade Thricedrowned usually has it.
  • Surge - miniboss water ele
  • Stemming the Tide - kill water eles (20)
  • Water Warriors - kill water eles (24)
  • Heroic Encounter: Aquatic Elf Abduction - HE silver level
  • Heroic Encounter: Fountain of Fear - HE gold level, hard
*Seychell
  • Waterbourne Warning - deploy 3 buoys at the beach
  • Hullbreaker - miniboss troll
  • The Ravenous Host - kill lacedons (12) - probably tired of them by now though :P
  • Heroic Encounter: No Room at the Inn - HE (silver tough, starts at main floor so multiple groups right away)

After finishing that, you just have to do a few tasks for the Sea Druid hiding in a tree then you can go fight Gar Shatterkeel in the Sea Cave instance. Like most Neverwinter Bosses, he summons adds as he loses HP. They are finite, so if you kill the adds you will win eventually (Gar is basically a caster so most of his attacks are easy enough to evade, just kill him slow). Alternatively, just lure him far away from his starting spot to eradicate him at your leisure.

Once that is done, just one more trip through the "hard water" is required to collect the Seed of Water and you are done! I wonder if anyone has actually drowned in there.

Thursday, 30 April 2015

Neverwinter Online: Vigilance Quest Guide

With Module 6: Elemental Evil came a whole bunch of repetitive "Vigilance" quests and now that I've gone through the whole lot twice I thought I might make a little guide to help clear your 16 (tasks) x 3 (areas) x 4 (zones) quests as efficiently as possible. In subsequent posts I'll be going into each zone by detail, but for now just some general info.

  • You can "properly" start Elemental Evil upon reaching level 60. Talk to Sgt. Knox.
  • I suggest doing the first three intro quests with Minsc as it introduces you to the new mobs.
  • You can only carry 4 vigilance tasks at one time.
  • In theory you can finish a set of 16 tasks by doing the same quest 16 times but that isn't a good use of time.
  • If you have finished quests and are near the quest givers, go back and hand them in / pick up new ones.
  • Each area has 16 vigilance tasks available but only in batches of 8 which switch over each hour.
  • Each area offers an instanced dungeon. Only go in if you have the two dungeon quests (one before the hour and one after).
  • Personally, I try skip the instanced dungeons (if solo) as you can get more done outside them.
  • It is faster and easier to clear quests in an organized team (carrying the same quests).
  • Reaching level 70 gives you an artifact off hand weapon. Talk to Sgt. Knox. (thanks Shintar!)
  • Finishing the Vigilance cycles of Spinward Rise (last area) gives you an artifact main hand weapon.
  • It is possible just to level up to 70 elsewhere and charge Spinward Rise directly, skipping the other zones.
  • Don't forget to buy potions and sell loot during down times when there are no (decent) quests available.

Clear as mud? Next up, we'll start looking at each zone in detail. :)

Drowned Shore Vigilance Guide
Reclamation Rock Vigilance Guide
Fiery Pit Vigilance Guide
Spinward Rise Vigilance Guide 

Friday, 27 February 2015

Vindictus: Executioner Pantheum

[This is part of my Vindictus tutorials.]

There are a number of Raid missions in the Twilight Desert and Executioner Pantheum is probably the easiest one there for a Kai. As a raid though, the rule of thumb is go with a full party just to make things go faster. Pantheum has his own large arena which features four corner pillars around an open center stage that actually does him no favors. For starters, all his regular moves match that of any reaper you've previously fought so you should know how to evade if he gets up to you.

Use the pillars as cover during the fight if possible as they block Pantheum's movement and attacks. When Pantheum goes into "lightning" mode, he becomes invulnerable unless he walks within a set radius of an active pillar. Make sure you are using the same pillar the rest of the team is while you do this as the pillar activation times are much shorter than his lightning mode (and each pillar has a long recharge time) meaning you'll need to displace a few times if all is going well.

Just pretend you are in an FPS. Use cover!

When he goes into "Fire" mode the central stage lights up with damaging flame. Continue combat as before, using pillars as cover from his fireballs but keep an eye on the stage. As soon as the central flames go out, get in there because everything outside will pretty much die in a big explosion. Rinse and repeat until you win. :)

Tuesday, 17 February 2015

Vanquishing Vindictus: Tutorial Compilation

After posting that Attack on Titan Tutorial Compilation I decided to do some house keeping with my Vindictus guides and whack them all here. As I often point out in the posts themselves, most of these are for a Kai (archer) type, but hopefully you will find some of it useful regardless. :)

Newbie Guide
Lessons from Vampires
Monkeys in the Snow
King of the Trolls
Oversized Enemies
Sewer Sniping
Snake Worshippers
Pirates of the Graveyard
Reapers of the Twilight Desert
Misty Summit Minis
Bosses of the Summit
Executioner Pantheum 
Titles and Special Potions

Wednesday, 17 December 2014

Vindictus: Sewer Sniping

[This is part of my Vindictus tutorials.]

More tips today but these are more for a Kai/ranged type.

The sewers are both an excellent and a horrible place for a Kai. Apart from being tight quarters and home to some agile lizardmen assassins (who are perhaps the only trash melee mob that manage to get up and damage me in a combo), it features very few types of boss chambers. The first is little more than a slightly larger than average square room. This type sucks, and you will have to fight fairly against the usually spry (ratman kung fu dude) or cheating boss within (I'm looking at you Shadow Shaman Ingkara - who summons shadows of other bosses to help him)!

Fortunately the other type of boss room is much more favourable, and is connected by a few passages to a portion that looks like this:


The bosses in those chambers can be lured back here, and then by simply standing on a different level you can snipe them at your leisure. Only the lizard assassin boss I think has means to chase you up and down, but even then it isn't consistent, giving you ample time to displace and snipe him from
elsewhere.

There's also one boss, Warrior Chuilin, who has a cliff. You have to be a bit speedy to make sure he is downstairs while you are up, but if you stand at this spot his AI breaks and again you can snipe the otherwise dangerous boss to death.

Owned.

Lastly, the raid boss Thor - a giant electric frog, is pretty easy for a Kai player in a group. Stay away from the frog. Stay out of the water. Fire at will. Easy peasy.

Saturday, 6 December 2014

Neverwinter Online: Tiamat has arrived!

I wasn't going to do a boss write-up today but this one seems to be needed at the moment. Despite the new and, as expected, grindy zone of the Well of Dragons being out for awhile it was only a few days ago did Tiamat actually begin trying to emerge from her temple (on the live server anyway).

Currently, the only requirement is that you can access the Well of Dragons to reach the temple to fight her. Doors open for 5 minutes every top of the hour. You will then get put into a small antechamber with 24 random players. Less random if you go in at the exact same second - use the count down timer to help with that.

The flames of your hate burn hotter than any of my breath attacks!

After the 5 minutes prep time in which you really should decide as a group if you are sending 5 people a head or zerging half and half, you will have 20 minutes to win. First step is kill the summoner (of your color - Rath Modar is "red"), take the dragon soul orb (of your color) and put it in a quick slot. Alternatively you can kill summoners 2 and 4 then jump to 1, 3 (Rath), and 5 which is supposedly quicker.

Remember to use this soul orb wisely as it will protect you and your allies from the otherwise insta-kill breath weapon of each head (and only the head of the matching color). Then kill cult leader Severin. All of this should be smooth sailing so go hard and go fast, ala the Dragon Herald zerg circuit. You'll know what that is when you hang around the Well of Dragons long enough.

The next part involves rounds of defending 3 clerics (Linu in the middle has the hardest time here) from demonic forces as they complete their spell to push Tiamat back in her hole. As clerics take damage their already slow filling progress meter is reduced. Use your best judgement and keep an eye on the progress bars to see who needs help. Ideally fight far away from the clerics too. If you stand at the edges you can make enemies throw themselves off for insta-kills which is great since all the adds are level 65 here.

When the cleric spell fires you have 2 minutes to damage each of the five heads as fast and as much as you can. Afterwards it becomes the cleric phase again then heads phase again and so on until you run out of time (at which point Elminster has to reverse time to cover your retreat) or you win.

How do you win? ALL FIVE heads must die in the SAME 2 minute gap. If any heads die early, they will be regenerated to 25% on the next cycle meaning you have just lost this hour's round for everyone. Characters also get various boons depending on how much treasure was recovered in the hour leading up to the temple doors opening but that is even more out of your control than this boss fight (unless you and your allies are crazy prepared), so just prep to fight without any boons. Health potions and injury kits aplenty are a good idea. :P

Tiamat is also one of the rare bosses in this game where adds should be ignored when the heads are open for attack. Nice going Cryptic!

Wednesday, 26 November 2014

Vindictus: Newbie Guide

[This is part of my Vindictus tutorials.]

So you've just started Vindictus, made a character, maybe fought a giant spider already, and are now in the town of Colhen wondering what is next? Here are some tips that hopefully help someone out there. Note: The information here is based on the US servers.


Don't Use Steam
This is dependent on your setup of course but I find that Steam lags me. Playing through Steam might be convenient, but you will get a more enjoyable experience if you play the game without it. If you installed it via Steam, have no fear. You can go to \Steam\steamapps\common\Vindictus\en-US and run Vindictus.exe from there. Moves that make you travel big distances are more likely to disconnect you than any other (like Kai's dodge grapple), so if latency is an issue for you keep this in mind.

Free Gear
You will notice pretty quick that gold is pretty hard to come by. Indeed, apart from the loose change you might pick up in missions you won't be getting paid for your work until you reach level 20. This is an intentional anti-bot method applied to the game. To balance it out, you can "shop" with Ceara at the Mercenary Outpost to get free equipment - as much as you want! Make the most of it because once you reach level 20, all of it becomes unusable to you. Not to worry though because at that stage the gold starts flowing in.

Go Questing
All quests are a good source of EXP and Gold. Some just involve talking to people to complete. Press "M" to view the list of what you have to do. I strongly recommend doing all the optional quests too. Most are collection quests for items that you can simply buy at the Marketplace. Obviously use your best judgement but most are a good trade off for gold vs time loss and EXP gain.

Use the Marketplace
All items have two values, a sell price (the price if sold to the NPC) and a market price (the average price on the market). Many items have a higher market price than the NPC sell price so make use of it! As mentioned before, also use it to buy quest items to save you some time and effort. You won't be able to do this in Season 2, where you are forced to farm all quest items yourself. Don't worry about the gold. It will come on its own. Unless you intend to craft yourself, then you might need to be more clever than I am here. 

"Jumping"
You will eventually come to areas that require "jumping". While there actually used to be a Jump function that has been removed. Instead just use your evade (Space) or sprint (double tap direction) in the direction of the gap and hopefully you will clear it. Of course this will only work if you are starting from a higher ledge than the one you are aiming for. As there is falling damage you should practice this early on. Later gaps will be fatal if you fail to clear them.

Honorbound
Check your inventory ("I" key) for an Honorbound event ticket. If you have one, use it! It will ask you to name someone who introduced you to Vindictus. The named person and yourself will recieve very useful bonuses every level you gain. If you are playing with a partner then name each other, or a friend you play with. If you have no one else to name then please name me "Josephsky" (if you are on US East)!

Carraige Driver is a Liar
The path to Rocheste is -NOT- dangerous and is only home to sheep. Feel free to run it on foot.

That's it for now! More tips, especially for archer characters, will be coming up soon! :)

Saturday, 3 May 2014

NBI: Guide for Creative Works

Since the it was actually requested by the NBI this year, I decided to make a small guide for creative works based on MMOs and such based on my previous experiences and failings. Hopefully someone finds this useful!

Know your Audience
Not everyone wants to read through an epic or play through a ridiculously difficult fan made game. It doesn't matter so much if you are just creating for yourself or for a small group but if you are trying to get the majority of people to view your work, first learn what that majority likes. For example in Neverwinter Online, majority of people prefer short and easy 15 minute player made quests over the longer ones that are spread across multiple chapters.

Plan and Draft
Regardless of your medium, you will want to make a plan first on how to handle it and how it flows. This might not be required as much if you are just doing cover songs, or a stylized drawing (though it would probably still help) but is quite essential in story telling. Making comics, animation, an in game quest or just writing a short tale will be much easier if you have the "skeleton" of what you want to do. Having to go back and change things because you didn't plan before hand is not only a time killer but also an enthusiasm slayer.

Writing Rules are still Relevant
Correctly constructed sentences, good spelling and good grammar are just the tip of the iceberg when it comes to writing. With most mediums you would still need to have a plot with believable characters and story progression.  

Creating Characters
The best characters are those that grow or change during the course of the story. At the minimum you want a character to have is a motivation and something obstructing their goals (it can be themselves or their feelings, or an enemy, whatever). If you are writing fan fiction then you probably already have characters built for you - try keep them in character if you use them. If you are adding your own you have more freedom, but must make sure you don't become a cardboard cutout of any other character in the story.

Stay within Context
Unless you have a clear idea what you are doing and how to do it, it is always best to try stay close to the lore of whatever game you are working with. For example having the Avengers show up in Guildwars 2 is going to be pretty tough to pull off well. It is more likely that mish mashing genre/MMOs will be devaluing to both sides.

Open with Action
A tip given to me that seems to be working. It doesn't have to be a lot, or even explained right away but opening with an action or fast paced sequence acts as a better hook than a more passive start. It's also easier to pull off than doing a good "quiet" start (haven't managed any of those yet personally).

Try put a Twist
Having something surprising happen that most of your audience didn't expect is always a good thing which can separate your work from the many others of a similar nature, and can hook them onto your work. The twist still has to be something that works in the story though. Events and people that appear out of the blue which your audience had no hope of anticipating don't work as nicely as those that do.

Advertise Correctly
If you are making a movie and advertise it as such, don't have an interactive part in. I got burned a little bit when I did that with my flash animation years ago. Apparently while gamers don't mind movies in their games, movie watchers don't like games in their movies. Just be as precise when spruiking your work so people know what to expect.

Expect a "No" from official endorsement
Especially if you don't yet have a finished product and they haven't seen any of your works before, it would be rare for any company to open the door to a potential PR problem. You'd need to be pretty successful in your field and be an extra positive for the game before they'd give you that, examples being Dulfy for GW2 guides and Malukah with her music.

Shadowing Text Example
If you are using a graphic medium, especially one that is animated, it can be difficult to put readable text within your work. This method should help a little, all it requires is that you take the same line of text - shade it a different color, and move it a few pixels horizontally and diagonally from the original line. You can also use it to break a few text rules like, "no white text on a white background". Even better if your graphics program uses layers as it makes it easy to fiddle around with to your liking. The effect is this:


Free Resources
Lastly here are some freely available resources on the web that I make use of often.

Pixlr - web based graphics editor, also handy for resizing images to smaller sizes
rhymezone.com - helps for poetry (could be useful for the Poetry Slam! :P)
thesaurus.com - helps for word swapping

Friday, 17 August 2012

Breaking Dawn

My journal through Stalker Soup - a mega mod for Shadows of Chernobyl! You can follow the rest of the story here!

The sun had begun to rise as I made my way towards the small stalker camp North of the rails where I met "Guide". The asshole didn't want to help me unless I got him a Tunder rifle though so feeling dejected I came back the way I came, sniping a few soldiers and wiping out a large bandit crew that had taken a farmstead before reaching the newbie village. Got a bunch of rewards from Sid, and handed in the laptop to Fanatic who then told me that opening a portal requires an artifact, and to open the next portal I need another laptop from the other lab. Bastard. Fortunately I had the "soul" artifact he wanted and he opened up the warp North of the railtracks (ofcourse, because putting it right there would be too easy). Sure enough I found it there, and after eliminating the pack of dogs wandering around it I stepped through to find myself at the Army Warehouses which was now the Freedom base. Seems that portal was a one way deal - typical.

The Freedom guys were quite passive, not caring if I took all their food and stuff though I did make a point to restock on VOG grenades from the people that had them. Outside the area was littered with anomalies and I found a neutral stalker camp led by Wolf (finally handed in his quest) in a metal scrap yard. Part of his group was "Master" who I also had to take out, so I punched his lights out too. He managed to stand up with his exo suit though but wasn't fast enough to retaliate. My next task here was just over the nearby hill covered in mist - to eliminate a bloodsucker village. Once I got up there my radar was just going crazy with how many of them there were. As soon as I opened fire, seven of them (and two zombie rats) rushed the hill I was on - stopped only by Saiga shells to the head. There were six more in the village as well as two Izolm. The radar adjustment ensured that none of them could get the drop on me anymore.

With that clear I did a West-East sweep of the region and decided to hike up to the next area called Radar. Before I got there I reached an Freedom outpost called "the Barrier" that only had two living soldiers left. They asked me to help them against an incoming wave of monolith troops. I looted their buddies and took up position watching the road. Soon enough three squads of Monolithians came charging down, but not one of them got past the makeshift fence. Can't speak for the two chimeras that wandered in afterwards though. After two trips back to the warehouse to sell loot I decided to push further into the next area known as Radar. It was foreboding that the road there was guarded by eight izolms.

Monolith is out there, and they don't like trespassers.

Thursday, 26 July 2012

Generation 7 Tips - Can I be a mongoose?

No but you can be an otter! There is no "story" for Generation 4-6 (they were just new areas - Rano, Physis and Connous) and there is no proper "quest" that starts this generation off (its also a new area - Couracle); in-fact you can skip it, but I've always thought skipping stuff is just giving yourself less game content and is generally a stupid thing to do. Here's the quick run through of the problem parts, and as usual, you can find the rest of my classes in the binding post:

Those Effing Fragments
You'll need to get yourself to Couracle in Iria and mark the mana tunnels at Cor and the one nearest Pantay swamp (still kinda far). Remember that if you have no flying mount you can just ride the hippos across the river. Once at the swamp you'll need to use L-rods to excavate chests and bring back fragments (2x2 preferred) to Voight. You are after an ancient sun, snow and lightning fragment and if you have been doing basic exploration AP harvesting then you know how to do this, and that Voight is going to fail on around 30% of your retrieved stuff. Be prepared to spend a lot of time in the swamp hunting for these. Also you will probably run into these during your prolonged stay there:

Giant dragonfly
Like spiders, these only know defense but can multi aggro if you are silly enough to wander into them. They also have low HP making them easy kills, but they are easy enough to avoid.

Hippos
Only found on the Western part of the swamp, these ones have "pig" AI and know defense and counter. They also have heavy stander due to being fat so be careful with normal attacks if you end up fighting one. Usually they'll leave you alone anyway, just don't provoke them.

Swamp Cobra
Has your standard snake AI (with smash) but is possibly the first critter you've encountered that has poison. Poison in mabi is very bad in that it does a percentage damage based on how many HP the victim still has. It won't kill you but it will get you to 1 HP pretty quick. For this reason if you have to fight these, kill them fast and don't let them bite you!

Gator
Aggressive sharp-toothed lizards that like hiding in the swampy water. They aggro pretty quick, enjoy smashing, and do high levels of damage. Of all the swamp critters, these are the ones you will probably end up fighting most during this section. They will easily outrun you so fight well and bring bandages to recover from any injury (black) damage  they do.

Hobgoblins
Can pop out in pairs when you find chests. If they are exorcists then you can probably try take em out. Just treat them as goblins with magic, nothing really special. However if head hobgoblins appear I suggest you run. They have high levels of stander, high hp, fast multi aggro and do lots of damage making killing them before they and chestdespawn a bit of a challenge. Fortunately they only run as fast as you (human speed) so it should be easy, and probably less time consuming, to escape.

Row, Row, Row your Boat
Once you have all three you'll need to visit the temples at the bottom of Erkey falls. The only way to get there with out help is by rafting, so make your way up to the La Terra Highlands with 10 pieces of firewood and you can talk to the native up there to build your raft. Bringing sufficient pots to stay alive is also a good idea as you will be attacked by hobgoblins on your trip down river. If you have it, you can use advanced magic or high rank crash shot to blow away the opposition on the banks as you pass but otherwise just transform and make sure to steer the raft to the RIGHT at the junction or you'll have to do it again. Once you've made the turn, steer left to avoid docking (unless you want to get off at the hobgoblin village but you may lose your raft) and fall down the waterfall. The cutscenes here lag sometimes so just be patient and wait them out. Once down there it should be safe enough to do what you need to do. If the giant alligator is awake, it may be best to avoid it for now. :P

As a side note, Rafting is another way to gain exploration exp and is quicker (but obviously more dangerous) than doing the Cor circuit if you can kill lots of hobgoblins during each run.

Longa Otter - (as Ruwai)
The highlight of this story arc, Ruwai is pretty kickass for an otter. Use more of his normal attacks instead of smash as he can chain a long set of them and you should get past all the scum of this desert dungeon in no time.

Mirror Mirror (need a giant)
If you aren't a giant, you're going to need one to help you get through the Par Dungeon part of this arc. While there are "ice" or "snow" variants of things you should be familiar with, there are a few new enemies as well:

Shrieker
Floating ice heads that behave like wisps, though they favor ice bolt. Remember how to kill a wisp? Same thing here.

Bandersnatch
Almost the same as zombies, except on the lower floors they can sprint at you and do pretty good damage. They have low HPs though which makes a giant's stomp the ideal way to neutralize them. Windmill works too, but the most widely accepted method is firebolt revolver to keep them at bay.

Wendigo
Treat is as a fit ogre that has higher defense against ranged and magic. The wendigo must die a specific death for the mirror witch to appear - it must be slain by a giant wielding an ice pole, and ice poles (if you don't have one) only drop when the wendigo uses stomp. Your main problem will be keeping this creep alive for your giant to bash as by this point, you will probably be able to dust him in short order if you aren't careful. To be safe, let your giant buddy solo him.

Mirror witch
She has many dangerous powers and broad array of defenses but she can't use any of them if she's pinned on the floor. Safest way to fight her is seriously to gang smash/windmill her. That may sound kinky but you'd better do it or it is you that will be raped. :P

Don't be fooled by her hotness, she's as cold as ice.


Longa Hide and Seek - (as Atrata)
The anti-climactic final dungeon - Atrata has no hope in fighting anything in here so just get used to using the "hide" action that is available to all elves as you hit those orbs. Remember it drains mana so drink up when you are running low.

Wednesday, 18 July 2012

All-Guide Binder

This was orignially a post to put all the skill guides floating about into one place to make them easier to find, but thanks to J. Meyer, it seems someone called Ninjams had the same idea first! (Not updated for awhile though). This is mainly his list I am putting here as it doesn't hurt to have more than one place. If the authors of these wish me to remove the link please just let me know, alternatively if you know of more please leave a comment so I can add it! This post will probably keep growing as time goes on. To find the rest of my classes please see the binding post.

GAMEPLAY

General
The G15 Trading System
Guide to shadow missions
Pet FAQ/guide
Saanis guide to Ant Hell (Connous Underground)

Combat
Shadow Wizard hard solo: A case study on massively multi-aggro handling
The warriors third hand: The role of pets in melee combat
Fundamentals of combat
Guide to your skill rank

Technical
Lag/computer optimization

SKILLS

Combat
Offensive Alchemy, By Naii
Alchemy 102 (who needs 101?)
Elfs powerful range attack, Final Shot
Defense to the extreme, Wind Guard

Windmill
Using Windmill Effectively
A guide to ranking Windmill!
Windmillers' guide to breezing through Ciar advanced

Life
Production Parties
How to rank the blacksmith skill :by Waui of Alexina
Meiyas blacksmithing guide and reference
How to rank the Enchant skill: by Zyrus
Potion Making, your fantasy (Sooni)
Sooni's guide to Refining
Sooni's guide to Tailoring
Herbalore, why don't you try it? Sooni
Paladins weaving FAQ
Yogurt's guide to trapping spiders behind obstacles
Sooni's guide to Weaving
Magitekkefka's guide to Cooking
Life skill guide: Refining
Kaxiyus music guide

CHARACTER

Melee
Guide to Human Melee skill builds, equipments and enchants

Ranged
Daisuke's archery guide

Magic
Zeo's Magic Skills Guide
The Royal Wizard!

Race
Elven handbook: Everything you need to know about elves

ITEMS

General
The Guide to Winemaking
Inuri's/Emiles guide to Merchanting
How to play an elf for free in G15 (an equipment guide)
Guide to tax and fee evasion
How to get wool bags and farm holy water
Dungeon pass guide - the best methods

Spirit Weapons
Ego jewel feeding tables
G15 Ego Guide (Information on Capped Egos and Transfer)

Enchantment Sets
Second chance: The low hp build
The tragic hero
Enchanters set; By Pataterose
Cp Gear the key to Mabinogi!

Foods
Ninjam's guide to getting fat
Fathippos guide to being healthy

WEB
Pikablus short guide to getting a good IGN without having to use x's or numbers