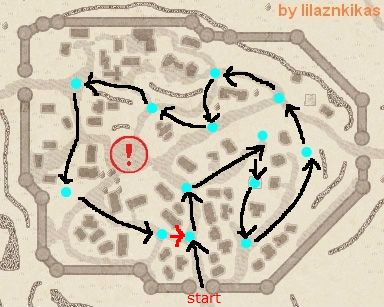
Welcome to my quick guide for Generation 10! I am assuming you have read through the previous classes at this point which means you already have a good grasp of the majority of the enemies here. You've already survived G9 so you won't find G10 so bad. After the last quest line, the shadow forces are in withdrawal (I assume), but those pesky alchemists are still up to no good. Here are the spots I think may give you grief.
Survivor Rescue (solo)
Welcome to Shadow Tara! Ironically the first things you see will be some of the strongest bastards in this story arc. Those shadow ghosts are highly dangerous and for now it would be wiser to flank and avoid them to reach your destination. You will however need to fight some bone soldiers who are pretty much exactly like their shadow counterparts, so nothing new here.
Lezarro's Book (solo or with royal alch)
Standard fare of killing stuff in orb sections, just stick to the main roads. If you are having problems finding the orbs bring along some arat berries to radar them out until you get used to where they spawn. The boss room features zombie soldiers, who basically are just like the Tir Na Nog zombies. I hope you've been practicing your windmill - if not this could be a difficult fight and you may want to look for a royal alch to help you out. Or better yet, just practice windmill?
Lileas' Honey (solo)
Just want to point out your main target here are the honeycomb trees, not the bad dudes. You don't have to kill any of them.
Jousting Practice
The last bit of a large collection quest has you joust against an NPC in the arena. This is a pretty fun mini-game and it is worth paying the small amount of gold to get used to it even after you've completed this quest. You'll need at least a mid-level proficiency in it (reading NPCs) later on.
Cubic collection (fastest solo)
Getting you exploration up should be easy by now if you've been doing the Cor circuit. When it's time to get the cubic stuff just load up on passes before heading out. Fastest collection is by only doing the first 2-3 rooms, wiping out mimics, then leave and repeat until your collection book is complete.
Third Wheel in Maiz (as Arenren solo then as Voight and Isla - you need a friend)
If you haven't yet gone to get your Final Hit quest (humans) then there's a high chance you've not been in the Maiz Praire ruins before, and you are in for some tough opposition. When doing the 2 player version, Voight will be doing most of the fighting but Isla -MUST- still cover him. Use magic to buy him time to windmill or counter the multi-aggro mobs.
Slates
They behave like goblins but have very high protection (no passive defense though) and even higher damage. Using defense will probably still result in serious injury so windmill, counter, and smash if the opportunity presents itself.
Skeleton Ghost
Generally all ghosts in Mabi are bad news, at least this type has no passive defense. They do dual aggro quick and do very good damage in both melee and magic. Final hit may result in your death if two of them are on you, so you are better off luring one to a free corner and dealing with it the usual windmill, counter way. Be ready to take action if it charges up magic though as it will almost always move in for a melee swipe right after. They can also windmill.
Return to Longa (fastest with party)
Just variations of the critters you fought on your last run through here, the only thing new is the boss at the end - a familiar named alchemist. He tends to just behave like any other alchemist though, with the extra ability of healing to full if he yells "I am immortal!". Makes you wonder why he doesn't just keep doing it. Anyway, if you are solo just turn on trans and wipe the floor with him - get ready for the usual wind/water blast combo. If you have a group, just keep him on the floor so he can't do anything with smash-mill.
Fomor Mata (solo)
The fights to the arena should be nothing new for you, but when you get there your jousting skills will be put to the test against a fomor commander. Fail the joust and you fail the mission. Hope you've been practicing! Win the joust and then you have to beat him on foot. He is pretty much the same as the named commander in the previous story arc only in black armor instead of gold. Look out for his golems and his life drain and remember you can use the entire city to maneuver around if need be. Don't open with a smash as he has instinctive reaction. Poison may be useful against him if you or better yet, a pet has it.
Couracle's Heart Again, because you forgot to pick it up last time (bring full party)
Basically you'll be fighting a zillion baddies you've already fought before - just all at once. To this end bringing a full party is recommended. In the final area you'll be joined by NPCs from Tailltean who once again must survive the encounter. Don't worry, it's not as bad as the "Last Battle" in the previous story arc. Those shadow ghosts you avoided in the first mission will be here again, and this time you'll need to fight them. They have thunder (perhaps your first baddie with adv. magic) which can easily kill anyone and heavy stander so make sure they don't get to cast by standard gang smash-mill. One skilled person can disable the ghost long enough for his buddies to kill the rest then help out. Alternatively 2 should be able to take out a ghost directly by keeping it on its ass.
The only thing in your way is yourself (solo or with royal alch)
Before entering the shadow realm prep a cylinder in one weapon slot and your primary weapon in the other. Also prepare a hotkey for "life drain" even if it is at novice rank and move all your current life drain crystals to the top left of your inventory if you have any. The finale takes place in a very familiar place and has two stages. Your enemy will be using alchemy skills that you can use evasion to dodge plus demi god abilities which are evadable by just running around. Any damage you do to it will hurt you by 50% - but this is not a bad thing. Punch its face once (cylinder equipped) to injure yourself then evade like crazy. After it does the "area" attack (as opposed to the light spear attack) it will taunt you so use the music box to make it go crazy temporarily. As soon as this happens hit your life drain hot key and drain the bastard (if you brought a royal alch this is his job). To proceed to the next stage the life drain must restore you to full health, so you cannot be too injured (unless your life drain skill is unusually high) and not be on full health to start with. If you run out of dark life drain crystals or he kills you, you may as well restart the mission and save any nao stones you were planning on using for stage two.
Second stage has him summon some buddies but now you have the demigod power. Don't be hasty as it doesn't make you invulnerable! Your regen will be much higher now and you should be able to outrun all your enemies, but having HP and Mana pots in reserve is a good idea (you should know to be using mana shield by now). If you followed each story arc then the best thing to do now is stand in a clear side of the circle and call for a dragon strike on those bastards then work on slaying the main guy. He will resummon all his pals if you kill all of them, so if possible leave one or two far away so you can deal with the main baddie in peace. You can then go berserk using your new abilites on your foe to destroy it quicker. Ho ho ho, now you have demi-god mode. :)
Showing posts with label Couracle. Show all posts
Wednesday, 1 August 2012
Generation 10 Tips - A Demigod is Born
Labels:
Advice,
Arenren,
Classes,
Cor,
Couracle,
G10,
Generation 10,
Lezarro,
Lileas,
Longa,
Mabinogi,
Mabinogi NA,
Maiz,
Soul Stream,
Tara,
Tips,
Tir Na Nog,
Voight
Monday, 30 July 2012
Generation 9 Tips (Part Two) - For SCIENCE!
After setting the stage in part one, the bad guys are on the offensive and you'll be spending loads of time in the shadow realm to hold them back. "Fomor Counterattack!" makes you run regular shadow missions to display this and they are all quickest to be finished on BASIC. Later on you will not be given a choice on difficulty. :P
Defeat a Bovine (fastest with friend)
Your first important scouting mission is to wander around and get stoned again, just like the previous mission. Only this time you can bring a friend and instead of looking for a dude with wings you are looking for an ugly cow. I guess the enemy eats these cows so, eliminating one will make them starve or something? Who knows. New baddies anyway are:
Shadow Shire
Evil horsey! They smash hard and will multi-aggro with whoever they are with (never alone). Probably on the same "to-kill" tier as shadow lancers. Being horses they gallop around pretty quick and will generally be the ones to catch you mid-skill if you aren't careful.
Crag Cow
You've fought these already as Leymore but perhaps this single cow is your first as your actual character. Treat it as a gorgon with -heavier- stander with more HP and does more damage. Smash, windmill, and counter your way to victory.
Defeat the Shadow Warrior (solo)
Seems the city is being held by a single fomor bastard with a few minions. This is a simple run through the shadow city against mostly single aggro spawns. Once you clear all the orbs you get to fight Lo Wang... erm I mean, a Shadow Warrior who is essentially a beefed up shadow fighter. Get used to them as they will come out as regular baddies soon. Also, it will pay to develop a route to follow to hit all the orbs on the map as you will be doing this a LOT - sometimes even twice in one mission.
Taillteann Defensive Battle (3-6 people, 6 ideal so everyone has someone to chat to)
Now that you've taken the city you need to defend the gates against enemy forces as they march in. Well that's a lie, more like you need to defend the gate guard NPCs as enemies "beam in" from the mothership. Each pair of NPCs have no chance in surviving the onslaught so it will be up to you to kill them quickly. Windmill and pets are highly recommended. Be sure to also heal the guards if you get the chance between waves as they need to survive around 20 minutes. The giant guards are particularly moronic in this mission. Should a pair of NPCs fall, follow the road back towards the center where the spawning will continue. If too many pairs die, game over - restart. High level dudes running this on basic can pretty much hold a gate solo, but it's just... boring.
Battle for Taillteann I (fastest with 4 people)
After your efforts in the previous mission the town has fallen and is now overrun with enemy forces. Good work. :P These scum are slightly better armored than previously and have more HP. They're also fortified behind barrier spikes and ice mines. To clear the entry quick you can get a buddy to call Adniel and dragon strike the first group out of the way. Alternatively rush the right most side where there's a gap between the wall and barrier. If you are mounted when you hit an ice mine, you can dismount and unsummon your steed to negate the effects. You can also use an L-rod to spot them and disable them with range or magic. Their archers can shoot over the barrier spikes so flank-charging is a good idea. There are no orbs here, so just circle the roads around the town square to find any opposition. Once you get in, you will meet a new baddie:
Shadow Commander
Gold armored dude is the "final" upgrade of a shadow fighter and he comes with instinctive reaction (don't open with a smash if he is idle), an ability to summon numerous snow golems (usually when near death), and a very fatal life drain which targets everyone in a set radius. He glows red and is technically invulnerable when this happens so unsummon any pets giving him more HP and back off yourself - you'll only be able to walk but if you have evasion you can use that to cover more ground faster. Final Hit is a good way to stop him doing anything if you've got it, otherwise strong windmill, normal attack or magnum range will suffice.
Defeat the Shadow Wizard (fastest with 8 people)
Since you beat the last mission the fomors have moved a friggin army in this time - as you will see in possibly your first orb run marathon, you'll need to clear the circuit twice and be facing pretty much everything you've already fought but in bigger numbers and in mixed spawn, so plenty of multi-aggro here. Second circuit provides slightly stronger enemy combos so the easiest way to go about this is just bring a big team to trash them quick. You -can- do this solo but it takes some time and skill. At the end you'll face a shadow Wizard Dude who is almost exactly like the shadow wizard chicks, except stronger. He can teleport around too, often jumping behind his intended victim. You can catch his teleport easily with a windmill so other than that, just treat him like one of the girls.
Conflict! An unexpected Battle (bring four people)
The fomors decided to setup a field camp outside the city (which I guess is the unexpected part in the title) and you are to assist an allied squad to wipe them out. Only problem is the enemy is fortified behind barrier spikes and ice mines (which you'll have no time to detect/disarm), they are elite troops, and should even ONE of your allies die (happens easily) you fail. Transform before entering as this is a very short but difficult mission and have two guys flank the barriers to take those archers out ASAP while the others protect the allied soldiers out front. It is possible to flank and call dragon air-support to eliminate the back rank quickly but you have to target the zone carefully - friendly fire will often result in mission fail.
Gay Times at Coill (as Elatha)
After all that fighting you are rewarded with some incubus on incubus action! Elatha fights better with magic and can still do decent damage with his wand so don't bother switching to the longsword. The only thing new in Coill for you will be an incubus at the end. In general they are bad bad news, have high levels in all passive defenses and can use advanced magic, along with doing high melee damage. Use a firebolt/icebolt combo to deal with him but be ready to counter or windmill if he gets too close.
Secret Experiment Time (easiest with friends)
Now it is back to the shadow realm to collect 8 clues. No new monsters but since it is now at the "level of the party leader" they may be stronger than usual. Also, everytime you run these missions they get longer and harder so to prevent arousing the bad guys so much you should work with friends, better if these friends are also looking for the clues. Clues appear at the end of each run, 2 per chest. One set - based on the in-game time you entered, one random.These are not tradable themselves but the treasure chest keys ARE. If you have buddies that don't need the clues have them hand over their treasure keys to help complete your book more quickly.
Set clues are:
12:00 AM - 3:00 AM, clue #1.
3:00 AM - 6:00 AM, clue #2.
6:00 AM - 9:00 AM, clue #3.
9:00 AM - 12:00 PM,clue #4.
12:00 PM - 3:00 PM, clue #5.
3:00 PM - 6:00 PM, clue #6.
6:00 PM - 9:00 PM, clue #7.
9:00 PM - 12:00 AM, clue #8.
Alchemy Experimentation (best bring a friend)
There are a few evil alchemists in this mission so bringing a friend to help deal with them is a good idea. Leymore will assist for one part of the mission too, don't let him die or it's game over. At the end a named Shadow Commander will appear and he will be tougher than the last one you fought. Team windmill or enough final hit should do the trick. If you prefer range then light up a fire first so that at least your first shots will do double damage. You have a lot of room to move - the whole city in fact. Just look out for those summoned golems as they will pack a punch.
Couracle's Heart (best with three people)
Similar to a higher level clue-hunting mission, by now you should be familiar with all the spawns and how to best deal with them. Your main adversary here is time. 30 minutes isn't very long to complete your circuit so speed up the process by bringing friends to clear the orb sections quickly. Don't forget to bring some paper to draw the damn thing once you get there. :P
Defeat a Bovine (fastest with friend)
Your first important scouting mission is to wander around and get stoned again, just like the previous mission. Only this time you can bring a friend and instead of looking for a dude with wings you are looking for an ugly cow. I guess the enemy eats these cows so, eliminating one will make them starve or something? Who knows. New baddies anyway are:
Shadow Shire
Evil horsey! They smash hard and will multi-aggro with whoever they are with (never alone). Probably on the same "to-kill" tier as shadow lancers. Being horses they gallop around pretty quick and will generally be the ones to catch you mid-skill if you aren't careful.
Crag Cow
You've fought these already as Leymore but perhaps this single cow is your first as your actual character. Treat it as a gorgon with -heavier- stander with more HP and does more damage. Smash, windmill, and counter your way to victory.
Defeat the Shadow Warrior (solo)
Seems the city is being held by a single fomor bastard with a few minions. This is a simple run through the shadow city against mostly single aggro spawns. Once you clear all the orbs you get to fight Lo Wang... erm I mean, a Shadow Warrior who is essentially a beefed up shadow fighter. Get used to them as they will come out as regular baddies soon. Also, it will pay to develop a route to follow to hit all the orbs on the map as you will be doing this a LOT - sometimes even twice in one mission.
That's the way I do it. Props to lilaznkikas for base map.
Taillteann Defensive Battle (3-6 people, 6 ideal so everyone has someone to chat to)
Now that you've taken the city you need to defend the gates against enemy forces as they march in. Well that's a lie, more like you need to defend the gate guard NPCs as enemies "beam in" from the mothership. Each pair of NPCs have no chance in surviving the onslaught so it will be up to you to kill them quickly. Windmill and pets are highly recommended. Be sure to also heal the guards if you get the chance between waves as they need to survive around 20 minutes. The giant guards are particularly moronic in this mission. Should a pair of NPCs fall, follow the road back towards the center where the spawning will continue. If too many pairs die, game over - restart. High level dudes running this on basic can pretty much hold a gate solo, but it's just... boring.
Battle for Taillteann I (fastest with 4 people)
After your efforts in the previous mission the town has fallen and is now overrun with enemy forces. Good work. :P These scum are slightly better armored than previously and have more HP. They're also fortified behind barrier spikes and ice mines. To clear the entry quick you can get a buddy to call Adniel and dragon strike the first group out of the way. Alternatively rush the right most side where there's a gap between the wall and barrier. If you are mounted when you hit an ice mine, you can dismount and unsummon your steed to negate the effects. You can also use an L-rod to spot them and disable them with range or magic. Their archers can shoot over the barrier spikes so flank-charging is a good idea. There are no orbs here, so just circle the roads around the town square to find any opposition. Once you get in, you will meet a new baddie:
Shadow Commander
Gold armored dude is the "final" upgrade of a shadow fighter and he comes with instinctive reaction (don't open with a smash if he is idle), an ability to summon numerous snow golems (usually when near death), and a very fatal life drain which targets everyone in a set radius. He glows red and is technically invulnerable when this happens so unsummon any pets giving him more HP and back off yourself - you'll only be able to walk but if you have evasion you can use that to cover more ground faster. Final Hit is a good way to stop him doing anything if you've got it, otherwise strong windmill, normal attack or magnum range will suffice.
Defeat the Shadow Wizard (fastest with 8 people)
Since you beat the last mission the fomors have moved a friggin army in this time - as you will see in possibly your first orb run marathon, you'll need to clear the circuit twice and be facing pretty much everything you've already fought but in bigger numbers and in mixed spawn, so plenty of multi-aggro here. Second circuit provides slightly stronger enemy combos so the easiest way to go about this is just bring a big team to trash them quick. You -can- do this solo but it takes some time and skill. At the end you'll face a shadow Wizard Dude who is almost exactly like the shadow wizard chicks, except stronger. He can teleport around too, often jumping behind his intended victim. You can catch his teleport easily with a windmill so other than that, just treat him like one of the girls.
Conflict! An unexpected Battle (bring four people)
The fomors decided to setup a field camp outside the city (which I guess is the unexpected part in the title) and you are to assist an allied squad to wipe them out. Only problem is the enemy is fortified behind barrier spikes and ice mines (which you'll have no time to detect/disarm), they are elite troops, and should even ONE of your allies die (happens easily) you fail. Transform before entering as this is a very short but difficult mission and have two guys flank the barriers to take those archers out ASAP while the others protect the allied soldiers out front. It is possible to flank and call dragon air-support to eliminate the back rank quickly but you have to target the zone carefully - friendly fire will often result in mission fail.
Gay Times at Coill (as Elatha)
After all that fighting you are rewarded with some incubus on incubus action! Elatha fights better with magic and can still do decent damage with his wand so don't bother switching to the longsword. The only thing new in Coill for you will be an incubus at the end. In general they are bad bad news, have high levels in all passive defenses and can use advanced magic, along with doing high melee damage. Use a firebolt/icebolt combo to deal with him but be ready to counter or windmill if he gets too close.
Secret Experiment Time (easiest with friends)
Now it is back to the shadow realm to collect 8 clues. No new monsters but since it is now at the "level of the party leader" they may be stronger than usual. Also, everytime you run these missions they get longer and harder so to prevent arousing the bad guys so much you should work with friends, better if these friends are also looking for the clues. Clues appear at the end of each run, 2 per chest. One set - based on the in-game time you entered, one random.These are not tradable themselves but the treasure chest keys ARE. If you have buddies that don't need the clues have them hand over their treasure keys to help complete your book more quickly.
Set clues are:
12:00 AM - 3:00 AM, clue #1.
3:00 AM - 6:00 AM, clue #2.
6:00 AM - 9:00 AM, clue #3.
9:00 AM - 12:00 PM,clue #4.
12:00 PM - 3:00 PM, clue #5.
3:00 PM - 6:00 PM, clue #6.
6:00 PM - 9:00 PM, clue #7.
9:00 PM - 12:00 AM, clue #8.
Alchemy Experimentation (best bring a friend)
There are a few evil alchemists in this mission so bringing a friend to help deal with them is a good idea. Leymore will assist for one part of the mission too, don't let him die or it's game over. At the end a named Shadow Commander will appear and he will be tougher than the last one you fought. Team windmill or enough final hit should do the trick. If you prefer range then light up a fire first so that at least your first shots will do double damage. You have a lot of room to move - the whole city in fact. Just look out for those summoned golems as they will pack a punch.
Couracle's Heart (best with three people)
Similar to a higher level clue-hunting mission, by now you should be familiar with all the spawns and how to best deal with them. Your main adversary here is time. 30 minutes isn't very long to complete your circuit so speed up the process by bringing friends to clear the orb sections quickly. Don't forget to bring some paper to draw the damn thing once you get there. :P
Labels:
Advice,
Coill,
Couracle,
Elatha,
Fomor,
Lesson,
Leymore,
Mabinogi,
Mabinogi NA,
Shadow Mission,
Taillteann,
Tips
Thursday, 26 July 2012
Generation 7 Tips - Can I be a mongoose?
No but you can be an otter! There is no "story" for Generation 4-6 (they were just new areas - Rano, Physis and Connous) and there is no proper "quest" that starts this generation off (its also a new area - Couracle); in-fact you can skip it, but I've always thought skipping stuff is just giving yourself less game content and is generally a stupid thing to do. Here's the quick run through of the problem parts, and as usual, you can find the rest of my classes in the binding post:
Those Effing Fragments
You'll need to get yourself to Couracle in Iria and mark the mana tunnels at Cor and the one nearest Pantay swamp (still kinda far). Remember that if you have no flying mount you can just ride the hippos across the river. Once at the swamp you'll need to use L-rods to excavate chests and bring back fragments (2x2 preferred) to Voight. You are after an ancient sun, snow and lightning fragment and if you have been doing basic exploration AP harvesting then you know how to do this, and that Voight is going to fail on around 30% of your retrieved stuff. Be prepared to spend a lot of time in the swamp hunting for these. Also you will probably run into these during your prolonged stay there:
Giant dragonfly
Like spiders, these only know defense but can multi aggro if you are silly enough to wander into them. They also have low HP making them easy kills, but they are easy enough to avoid.
Hippos
Only found on the Western part of the swamp, these ones have "pig" AI and know defense and counter. They also have heavy stander due to being fat so be careful with normal attacks if you end up fighting one. Usually they'll leave you alone anyway, just don't provoke them.
Swamp Cobra
Has your standard snake AI (with smash) but is possibly the first critter you've encountered that has poison. Poison in mabi is very bad in that it does a percentage damage based on how many HP the victim still has. It won't kill you but it will get you to 1 HP pretty quick. For this reason if you have to fight these, kill them fast and don't let them bite you!
Gator
Aggressive sharp-toothed lizards that like hiding in the swampy water. They aggro pretty quick, enjoy smashing, and do high levels of damage. Of all the swamp critters, these are the ones you will probably end up fighting most during this section. They will easily outrun you so fight well and bring bandages to recover from any injury (black) damage they do.
Hobgoblins
Can pop out in pairs when you find chests. If they are exorcists then you can probably try take em out. Just treat them as goblins with magic, nothing really special. However if head hobgoblins appear I suggest you run. They have high levels of stander, high hp, fast multi aggro and do lots of damage making killing them before they and chestdespawn a bit of a challenge. Fortunately they only run as fast as you (human speed) so it should be easy, and probably less time consuming, to escape.
Row, Row, Row your Boat
Once you have all three you'll need to visit the temples at the bottom of Erkey falls. The only way to get there with out help is by rafting, so make your way up to the La Terra Highlands with 10 pieces of firewood and you can talk to the native up there to build your raft. Bringing sufficient pots to stay alive is also a good idea as you will be attacked by hobgoblins on your trip down river. If you have it, you can use advanced magic or high rank crash shot to blow away the opposition on the banks as you pass but otherwise just transform and make sure to steer the raft to the RIGHT at the junction or you'll have to do it again. Once you've made the turn, steer left to avoid docking (unless you want to get off at the hobgoblin village but you may lose your raft) and fall down the waterfall. The cutscenes here lag sometimes so just be patient and wait them out. Once down there it should be safe enough to do what you need to do. If the giant alligator is awake, it may be best to avoid it for now. :P
As a side note, Rafting is another way to gain exploration exp and is quicker (but obviously more dangerous) than doing the Cor circuit if you can kill lots of hobgoblins during each run.
Longa Otter - (as Ruwai)
The highlight of this story arc, Ruwai is pretty kickass for an otter. Use more of his normal attacks instead of smash as he can chain a long set of them and you should get past all the scum of this desert dungeon in no time.
Mirror Mirror (need a giant)
If you aren't a giant, you're going to need one to help you get through the Par Dungeon part of this arc. While there are "ice" or "snow" variants of things you should be familiar with, there are a few new enemies as well:
Shrieker
Floating ice heads that behave like wisps, though they favor ice bolt. Remember how to kill a wisp? Same thing here.
Bandersnatch
Almost the same as zombies, except on the lower floors they can sprint at you and do pretty good damage. They have low HPs though which makes a giant's stomp the ideal way to neutralize them. Windmill works too, but the most widely accepted method is firebolt revolver to keep them at bay.
Wendigo
Treat is as a fit ogre that has higher defense against ranged and magic. The wendigo must die a specific death for the mirror witch to appear - it must be slain by a giant wielding an ice pole, and ice poles (if you don't have one) only drop when the wendigo uses stomp. Your main problem will be keeping this creep alive for your giant to bash as by this point, you will probably be able to dust him in short order if you aren't careful. To be safe, let your giant buddy solo him.
Mirror witch
She has many dangerous powers and broad array of defenses but she can't use any of them if she's pinned on the floor. Safest way to fight her is seriously to gang smash/windmill her. That may sound kinky but you'd better do it or it is you that will be raped. :P
Longa Hide and Seek - (as Atrata)
The anti-climactic final dungeon - Atrata has no hope in fighting anything in here so just get used to using the "hide" action that is available to all elves as you hit those orbs. Remember it drains mana so drink up when you are running low.
Those Effing Fragments
You'll need to get yourself to Couracle in Iria and mark the mana tunnels at Cor and the one nearest Pantay swamp (still kinda far). Remember that if you have no flying mount you can just ride the hippos across the river. Once at the swamp you'll need to use L-rods to excavate chests and bring back fragments (2x2 preferred) to Voight. You are after an ancient sun, snow and lightning fragment and if you have been doing basic exploration AP harvesting then you know how to do this, and that Voight is going to fail on around 30% of your retrieved stuff. Be prepared to spend a lot of time in the swamp hunting for these. Also you will probably run into these during your prolonged stay there:
Giant dragonfly
Like spiders, these only know defense but can multi aggro if you are silly enough to wander into them. They also have low HP making them easy kills, but they are easy enough to avoid.
Hippos
Only found on the Western part of the swamp, these ones have "pig" AI and know defense and counter. They also have heavy stander due to being fat so be careful with normal attacks if you end up fighting one. Usually they'll leave you alone anyway, just don't provoke them.
Swamp Cobra
Has your standard snake AI (with smash) but is possibly the first critter you've encountered that has poison. Poison in mabi is very bad in that it does a percentage damage based on how many HP the victim still has. It won't kill you but it will get you to 1 HP pretty quick. For this reason if you have to fight these, kill them fast and don't let them bite you!
Gator
Aggressive sharp-toothed lizards that like hiding in the swampy water. They aggro pretty quick, enjoy smashing, and do high levels of damage. Of all the swamp critters, these are the ones you will probably end up fighting most during this section. They will easily outrun you so fight well and bring bandages to recover from any injury (black) damage they do.
Hobgoblins
Can pop out in pairs when you find chests. If they are exorcists then you can probably try take em out. Just treat them as goblins with magic, nothing really special. However if head hobgoblins appear I suggest you run. They have high levels of stander, high hp, fast multi aggro and do lots of damage making killing them before they and chestdespawn a bit of a challenge. Fortunately they only run as fast as you (human speed) so it should be easy, and probably less time consuming, to escape.
Row, Row, Row your Boat
Once you have all three you'll need to visit the temples at the bottom of Erkey falls. The only way to get there with out help is by rafting, so make your way up to the La Terra Highlands with 10 pieces of firewood and you can talk to the native up there to build your raft. Bringing sufficient pots to stay alive is also a good idea as you will be attacked by hobgoblins on your trip down river. If you have it, you can use advanced magic or high rank crash shot to blow away the opposition on the banks as you pass but otherwise just transform and make sure to steer the raft to the RIGHT at the junction or you'll have to do it again. Once you've made the turn, steer left to avoid docking (unless you want to get off at the hobgoblin village but you may lose your raft) and fall down the waterfall. The cutscenes here lag sometimes so just be patient and wait them out. Once down there it should be safe enough to do what you need to do. If the giant alligator is awake, it may be best to avoid it for now. :P
As a side note, Rafting is another way to gain exploration exp and is quicker (but obviously more dangerous) than doing the Cor circuit if you can kill lots of hobgoblins during each run.
Longa Otter - (as Ruwai)
The highlight of this story arc, Ruwai is pretty kickass for an otter. Use more of his normal attacks instead of smash as he can chain a long set of them and you should get past all the scum of this desert dungeon in no time.
Mirror Mirror (need a giant)
If you aren't a giant, you're going to need one to help you get through the Par Dungeon part of this arc. While there are "ice" or "snow" variants of things you should be familiar with, there are a few new enemies as well:
Shrieker
Floating ice heads that behave like wisps, though they favor ice bolt. Remember how to kill a wisp? Same thing here.
Bandersnatch
Almost the same as zombies, except on the lower floors they can sprint at you and do pretty good damage. They have low HPs though which makes a giant's stomp the ideal way to neutralize them. Windmill works too, but the most widely accepted method is firebolt revolver to keep them at bay.
Wendigo
Treat is as a fit ogre that has higher defense against ranged and magic. The wendigo must die a specific death for the mirror witch to appear - it must be slain by a giant wielding an ice pole, and ice poles (if you don't have one) only drop when the wendigo uses stomp. Your main problem will be keeping this creep alive for your giant to bash as by this point, you will probably be able to dust him in short order if you aren't careful. To be safe, let your giant buddy solo him.
Mirror witch
She has many dangerous powers and broad array of defenses but she can't use any of them if she's pinned on the floor. Safest way to fight her is seriously to gang smash/windmill her. That may sound kinky but you'd better do it or it is you that will be raped. :P
Don't be fooled by her hotness, she's as cold as ice.
Longa Hide and Seek - (as Atrata)
The anti-climactic final dungeon - Atrata has no hope in fighting anything in here so just get used to using the "hide" action that is available to all elves as you hit those orbs. Remember it drains mana so drink up when you are running low.
Subscribe to:
Posts (Atom)