[Part of the Party Time journal]
After wiping out a Gloom cult gathering (complete with zombies and demons) at their ritual chamber with only DL getting KOed, we visit the Shrine of Strength to try get stronger by standing on pressure plates while being attacked by monsters... an interesting training method for sure! I'm the one that drops in that mission while Juris gets through all the doors to get the final chest. We then go up a mountain to investigate rumors of a dragon and instead get ambushed by Inox and elementals which knock Juris out, but are in turn wiped out by the three brothers. Jim's pretty good with his heals, disintegrating ray and spider bots!
While up there we hear a strange, beckoning voice and follow it into a cave system crawling with enemies, but as the mission this time is simply to open all the doors I use my rat-ninja skills to sneak through them all while the others basically hold the first room. Once all the doors are open the voice booms and disintegrates the remaining enemies, then asks us to free it. Suuuure, before doing that we return to the city to rest up and try learn more about it. Hail suggests the knowledge we seek is in the Shrine of the Depths, so we go there next and retrieve a chest from giant crab monsters and laser shooting eye stalk tentacles. At this point we're all pretty tough now, each having maxed out at level 9 through the course of these adventures.
Showing posts with label Elemental Evil. Show all posts
Showing posts with label Elemental Evil. Show all posts
Thursday, 23 May 2024
Gloomhaven: Voice of the Mountain

Friday, 13 November 2015
Photo Story: Never Adventures (Part 5) - #IntPiPoMo2015
[Part of my photo story folder and part of IntPiPoMo2015!]


The final cult group - the one of the air, makes base up at Spinward Rise.

Gravity is all out of whack up there.

You can pretty much fly in some places.

Even while mounted!

Don't worry, the landing isn't fatal. It's only near fatal.

It probably should be fatal if I shot you through the neck with an arrow?

Maybe that's why air archons all aim too high?

It does explain why cloud giants like baseball.

Not as scary as a half giant though!

"Whooo goes there?"

These cute things are pretty agile.

And occasionally menacing.

I do wonder where they come up with some of these names though.
Sometimes I can't help but wonder if it's meant to be a comedy.

ORLY?

Current #IntPiPoMo2015 Count - 54 / 50
Thursday, 12 November 2015
Photo Story: Never Adventures (Part 4) - #IntPiPoMo2015
[Part of my photo story folder and part of IntPiPoMo2015!]


Helms Hold is a strange place.

Some scenery just makes you go WTF?

I mean, just look at the double face palming castle.

The Earth cultists also want this zone, laying seige from their rock spire.
Odd choice given the amount of earthquakes in the region.

But still better than the Water cults gigantic bird bath base.

The earth cult leader has a bad hair day every day.

Especially when adventurers "heroically" mess with his stuff.

Obviously he makes use of earth elementals. That jump.

Also gorgons that are best fought with bladed or explosive suppositories.

Most annoyingly he never runs out of bulettes...
Current #IntPiPoMo2015 Count - 40 / 50
Wednesday, 11 November 2015
Photo Story: Never Adventures (Part 3) - #IntPiPoMo2015
[Part of my photo story folder and part of IntPiPoMo2015!]


Occasionally bad guys get into the city, like this elemental cult.

Good thing heroes that can leap above trees...

And shoot a horizontal line of arrows from a vertical bow are present to protect it.

It also helps that cultists are stupid. They don't even know how to sit.

Or try to talk tough when I'm already targeting them.

Here they are trying to break heavy metal pipes via regular kicks.

I even nearly caught the water cult leader with his pants down.

Guess he needed a mistress that didn't have crabs.

He also should have learned more water attacks since no one knows how to swim.
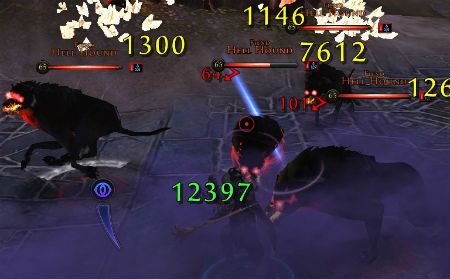
Fortunately even the dogs of the fire cult were more capable.

And their fire giants were actually dangerous...

Much like their skilled leader. She's one of the best 1 on 1 fights in my book.
Current #IntPiPoMo2015 Count - 30 / 50
Wednesday, 20 May 2015
NBI: Screenshot Safari! #NBI2015 #NBI2015Safari #Landscape
I'm putting this screeny in the #Landscape category because I have a feeling most of the others will be awesome, sweeping shots of the horizon so you can see the sky and perhaps get a sun flare effect like in J3w3l's shot.
Well, I thought I'd be different and show the a top-down view of the landscape when you are going 100KM/H off a tall cliff into a deep valley where your objective to "KILL EM ALL!" awaits while riding a rocket powered bike from the future that cannot, in any way, actually fly.
*Turns on blaring rock music*

The next two screenies are for Jeromai's Nostalgia Trip writing prompt of things in games that no longer exist...
First up we have this little garden and over sized statue in Neverwinter City. As of Elemental Evil, those are no longer there - replaced by the huge and more functional elemental tree of balance.

And here is a collage from an old Ultima Online shard that let each player hold a large contigent of NPC mercenaries and pets. When my guild took control of Trinsic, we decided to build an army of them (over 200) as city guards - and yes, most of them died in defense of the city.

I don't think any other shard lets you do that any more. Indeed, the second iteration of that very shard prevented it.
Well, I thought I'd be different and show the a top-down view of the landscape when you are going 100KM/H off a tall cliff into a deep valley where your objective to "KILL EM ALL!" awaits while riding a rocket powered bike from the future that cannot, in any way, actually fly.
*Turns on blaring rock music*

I tried to live up to the name of the game: Firefall!
The next two screenies are for Jeromai's Nostalgia Trip writing prompt of things in games that no longer exist...
First up we have this little garden and over sized statue in Neverwinter City. As of Elemental Evil, those are no longer there - replaced by the huge and more functional elemental tree of balance.

If you haven't tried get up on to rooftops, you should. It's fun!
And here is a collage from an old Ultima Online shard that let each player hold a large contigent of NPC mercenaries and pets. When my guild took control of Trinsic, we decided to build an army of them (over 200) as city guards - and yes, most of them died in defense of the city.

Dang, I miss my blue warhorse.
I don't think any other shard lets you do that any more. Indeed, the second iteration of that very shard prevented it.
Tuesday, 5 May 2015
Neverwinter Online: Spinward Rise Vigilance Guide
[Part of my Neverwinter Online: Vigilance Quest Guide.]
Welcome to the final zone of Elemental Evil! It is actually more travel friendly than all the previous zones as you unlock each island, however it can also be brutal in the way of combat, especially on the last island. Like before, be careful of pure melee groups of enemies. While it is easy to tell if a bunch of cultists are skirmishers, it is a little less obvious for air archons. Simply count the number of bows / blades they carry to know what to expect.
The repeating quest here is "Howling Hatred". Don't go out of your way to complete that until you reach the second island. There are also jumping puzzles (yay!) which are the easiest tasks to complete on each island. Basically you just have to find the correct jump point and then press and hold space bar while moving forward. If those big chunks of rock can fly through the air, why can't you?
Once at the top, you can either jump back the way you came or simply "fall" down. If you dodge just before hitting the ground, all your vertical momentum is halted and you take zero falling damage. Neat trick huh?
Last thing of note is a personal one here. I didn't go into -any- instanced dungeon as I felt there was enough to do top side so I can't give you any tips for those this time (other than don't go alone). At least it makes it exciting for you right? ;P
No point in changing the color coding now:
Green - Easy and/or fast.
Pink - If there's nothing else to do.
Red - Better to take a break than do these solo.
AVIA LANDING
The first island introduces you to Kenku, Axebeaks, Owlbears and jumping puzzles! Unlike the cramped confines of the Fiery Pit, it's pretty safe to wander around here. There are two entries to the cult barracks, and the Western one next to the Kenku camp is less defended. You can also go in with style by jumping in from a glider tower.
*Harper Evandriel
*Skreel Swiftwing
*Pirri The Swift
*Brokar Ironshod
WINDCALL TEMPLE
The second island is home to the rather safe cultist binding workshops, and the more dangerous air elemental summoning portals and altar of Yan-C-Bin. The encounters are a little stacked at Yan-C-Bin's place so expect multiple groups during combat there. Fortunately you should only need to do that a few times.
*Harper Evandriel
*Skreel Swiftwing
*Brokar Ironshod
THUNDERHEAD REACH
The final and most dangerous island is home to Cloud Giants who are rather adept at defeating adventurers since they never come alone. You'll get a "Scrying the Skies" mandatory quest to look through four telescopes which doesn't count to your Vigilance Quests but does give you a good idea of how the last island is laid out. The instanced dungeon here is Nimbus Tower which is probably where the Air Prophet is, but after hearing it takes 40 minutes to clear solo I opted to just leave it alone.
*Harper Evandriel
*Skreel Swiftwing
*Druid Okobo
*Pirri the Swift
Once that is done you just need to collect the Seed of Air, which might look like it's guarded by a giant and a bunch of air archons but if you dash along the left side and go all the way to the edge of the cliff they ignore you long enough for you to collect the seed and get out of there. Once that's done, congratulations - you have finished Elemental Evil! Enjoy your new artifact weapon. Don't forget that if you hit level 70, you can get an off hand artifact weapon too. See Sgt. Knox.. :)
Welcome to the final zone of Elemental Evil! It is actually more travel friendly than all the previous zones as you unlock each island, however it can also be brutal in the way of combat, especially on the last island. Like before, be careful of pure melee groups of enemies. While it is easy to tell if a bunch of cultists are skirmishers, it is a little less obvious for air archons. Simply count the number of bows / blades they carry to know what to expect.
The repeating quest here is "Howling Hatred". Don't go out of your way to complete that until you reach the second island. There are also jumping puzzles (yay!) which are the easiest tasks to complete on each island. Basically you just have to find the correct jump point and then press and hold space bar while moving forward. If those big chunks of rock can fly through the air, why can't you?
Once at the top, you can either jump back the way you came or simply "fall" down. If you dodge just before hitting the ground, all your vertical momentum is halted and you take zero falling damage. Neat trick huh?
Last thing of note is a personal one here. I didn't go into -any- instanced dungeon as I felt there was enough to do top side so I can't give you any tips for those this time (other than don't go alone). At least it makes it exciting for you right? ;P
No point in changing the color coding now:
Green - Easy and/or fast.
Pink - If there's nothing else to do.
Red - Better to take a break than do these solo.
AVIA LANDING
The first island introduces you to Kenku, Axebeaks, Owlbears and jumping puzzles! Unlike the cramped confines of the Fiery Pit, it's pretty safe to wander around here. There are two entries to the cult barracks, and the Western one next to the Kenku camp is less defended. You can also go in with style by jumping in from a glider tower.
*Harper Evandriel
- Tome of Air - Jumping Puzzle! Starts at the tall western glider tower.
- Learning to Fly - Collect 12 "flight" supplies from Glider towers (drops and pickup), kill 40 cultists
- Air Cult Assault - HE Encounter Silver - self completes sometimes. Odds of getting help to complete is high.
- Elemental Assault - HE Encounter Silver - self completes sometimes. Odds of getting help to complete is medium.
- Air Supply - Sabotage supplies 6 then 6 airships. Lots of Fighting.
- Twin Breezes - Raid air cult barracks instance
*Skreel Swiftwing
- Birds of a Feather - Rescue 6 kenku eggs. All guarded. Pickup.
- Shiny Metal - collect 10 weapons from kenku (pickup from camp barrels and drop), kill 30
- Kenku - defeat 40 kenku (goes well with two above)
- Fight the Wind - defeat air archons in barracks instance
*Pirri The Swift
- Target - Blackfeather - miniboss kenku. Kill fast as a kenku spawn lives right outside his cave.
- Target - North Wind - miniboss hurricaine cultist. Kill fast he appears next to a large group of cultists.
*Brokar Ironshod
- Flightless Fury - kill 15 axebeaks, 5 owlbears (doesn't mix well with any other quest)
- Lesser Air Runes - Available after your first 16 tasks, mandatory to open teleporter to next island.
WINDCALL TEMPLE
The second island is home to the rather safe cultist binding workshops, and the more dangerous air elemental summoning portals and altar of Yan-C-Bin. The encounters are a little stacked at Yan-C-Bin's place so expect multiple groups during combat there. Fortunately you should only need to do that a few times.
*Harper Evandriel
- Greater Tome of Air - jumping puzzle! Starts from the only glider tower near the workshops!
- Clearing the Air - add incense to 5 shrines at Yan-C-Bin's altar
- Air Cult Assault - HE Silver - self completes sometimes. Low chance for players to assist.
- Elemental Assault - HE Silver - self completes sometimes. Low chance for players to assist.
- Slaad Summoner - Kill the summoner in the Howling Maw instance
*Skreel Swiftwing
- Order out of Chaos - Gather 15 Slaad control gems from cultists (drops). Can get them from Avia landing - easier fights = faster
- Fiends of Limbo - Kill 40 Slaad at the pool of chaos. Slow to kill, doesn't even count if not in pool. Stupid.
- Feeding the Slaadi - free sacrificial victims in Howling maw instance
- Target - Windshear - Miniboss air archon - spawns near campfire. Kill fast to avoid archon respawn.
- Target - Glark the Rancid - miniboss death slaad. Tough fight: Hardest of these mini boss assassinations. Expect to continuously evade moving AoE "monster" while fighting him.
- Unbound Anger - release 5 air eles. Easy, you only have to fight cultists to do so.
- Windbreaker - disrupt 5 air ele portals. All guarded.
- Archon Anarchy - kill 35 air archons (goes well with above)
*Brokar Ironshod
- Greater Wind Runes - Available after you finish 16 of this set to unlock teleporter to the final island.
THUNDERHEAD REACH
The final and most dangerous island is home to Cloud Giants who are rather adept at defeating adventurers since they never come alone. You'll get a "Scrying the Skies" mandatory quest to look through four telescopes which doesn't count to your Vigilance Quests but does give you a good idea of how the last island is laid out. The instanced dungeon here is Nimbus Tower which is probably where the Air Prophet is, but after hearing it takes 40 minutes to clear solo I opted to just leave it alone.
*Harper Evandriel
- Grand Tome of Air - jumping puzzle! Starts from low broken tower next to two giants.
- Eyes in the Sky - gather 6 intel reports from cultists (Farm at Avia)
- War Chests - recover 12 war chest treasures (pickup, often guarded by cultists)
- Whispers on the Wind - collect 10 messages from cultists. (drops at a low rate. Best farmed at Avia)
- Air Cult Assault - HE Encounter. Very tough.
- Elemental Assault - HE Encounter. Very tough.
- Tempest in a Bottle - stop rituals in the Nimbus tower instance
*Skreel Swiftwing
- Giantslayer - kill 8 cloud giants. Good news: they mostly come in pairs. Bad news: they mostly come in pairs.
- The Cloud Forges - kill 4 cloud giant smiths. Usually come with air archons.
*Druid Okobo
- Archon Anarchy - slay 40 archons at Thunderhead Reach.
- Lofty Ideas - collect 5 air magic scrolls from cloud giants (drops)
- Cloud Magic - collect air magic lore and win Nimbus Tower instance
*Pirri the Swift
- Target - Rastari - kill cloud giant miniboss, the easiest cloud giant to kill since he comes alone!
- Target - Grackel - kill owlbear miniboss, hits hard with no telegraph. Good practice of controlling AI, has no nearby allies.
Once that is done you just need to collect the Seed of Air, which might look like it's guarded by a giant and a bunch of air archons but if you dash along the left side and go all the way to the edge of the cliff they ignore you long enough for you to collect the seed and get out of there. Once that's done, congratulations - you have finished Elemental Evil! Enjoy your new artifact weapon. Don't forget that if you hit level 70, you can get an off hand artifact weapon too. See Sgt. Knox.. :)
Monday, 4 May 2015
Neverwinter Online: Fiery Pit Vigilance Guide
[Part of my Neverwinter Online: Vigilance Quest Guide.]
This is the part where I remind you to spend those perk and power points you have accumulated, because the Fiery Pit is one dangerous place. Not only do enemies spawn pretty close to each other, which is annoying when going after mini bosses, but sometimes they spawn as SILVER enemies. Be sure to look before you leap! Also, the way the map is structured is that there is only one camp right at the start. This means there is a lot of travel time added on as your quests lead you deeper in.
The map is connected by central bridges patrolled by fire giants. You can avoid them by timing your crossing. Wait at the 90 degree angle of the bridge and just as the giant is about to step out, rush past and hop on the railing closest to you. The idea is to break his line of sight so he loses aggro. Alternatively just kill the giant.
Each area also has a "Making the Rounds" quest which you should take for extra XP. In the second and third areas, try ensure this task is completed before returning to base. Be especially careful about large groups of melee guys. If 5 skirmishers hit you it's most likely lights out. Use crowd control early to gain the initiative.
Lastly, you get a short quiz right at the beginning for some extra XP. While it's worth reading the lore, here's a quick recap that should get you by:
The Fire Cult is the enemy here, trying to awaken Maegera. The good guys, helping descendants of Delzoun who curiously called for outside help, have almost won and control half of city [fun fact: the other half of the city looks exactly the same] but due to low supplies need adventurers to finish off this war. Duergar are present too but are attacking everyone.
As usual, the color coding remains the same:
Green - Easy and/or fast.
Pink - If there's nothing else to do.
Red - Better to take a break than do these solo.
FIRST PATROL
Your first patrol mainly deals with the North East and South East parts of the map. Keeping this in mind, collect quests for the one spot to complete them faster and stop by the camp to resupply / sell / juggle quests every time you switch from one to the other. The Excavated Tomb is the instanced dungeon here but I recommend skipping it entirely as you'll almost always have something else to do topside.
*Grogbi Ironbeard
*Horath Pegra
SECOND PATROL
Your next tasks will be found on the Center and South areas of the map. The Burning Heart instance is the dungeon here, but again I recommend skipping. Enough to do top side. Or, use the time to take a break from all the intense fighting! Go have some cookies or milk or something! If the player is tired, you won't be as effective! :P
There's also a scavanger hunt quest here called "Services Rendered" to collect 25 mithril ingots. It can be annoying at first if you don't know where they are, but goes rather fast when you do. You can also switch channels to get ingots from places you've already visited. Look for them under wagons, in corners, on staircase bannisters, on the roof, ledges, anywhere and everywhere in the center you can jump to is fair game. To get you started here are nine of them, starting from the great hall directly across the camp.
1) Next to Center Throne
2) from Throne turn left, behind pillar
3) from Throne turn right, behind some curtains
4) from Throne turn around, under bench (probably first one you will pick up)
5) on long rod thing above the fire pit
6) South side staircase from great hall: nook in the wall
7) South side staircase from great hall: two along the left side (easy to spot)
8) North side staircase from great hall: On the south railing of a giant's bridge
9) North side staircase from great hall: On a pillar near #8. Just look down stairs and to the left.
*Farah Dahl
*Thannis Beke
THIRD PATROL
Your final patrol deals with the North West and South West zones, as well as the West center. Unlike before, it doesn't really matter which zones the quests lead to as you will be visiting all those areas if you are going for the extra XP from "Making the Rounds". An easy highway to the North West exists where you just have to cross one bridge north, then follow the path West all the way, avoiding the patrolling bridge giants.
The instanced dungeon here is the Cistern, and in it you will encounter Vanifer, the flame prophet. Unlike the last two fools she is quite capable of killing you on her own, behaving much like an Ash Disciple. Her area attacks are extremely dangerous and failure to evade or block will probably result in death. She also starts with a bodyguard (take him out fast, but cleanly) and summons more adds as she takes damage. Due to this I highly advise luring her out of her chamber and using the whole rest of the dungeon space to fight her. I also recommend using single big hits for this fight, instead of swinging blades continuously so that you can concentrate more on evading.
Eventually, she will run away. :P
*Lucas Shaneway III
*Captain Montrose
Once that is all done the last thing to do is to pick up the Seed of Fire, guarded by a few measly archons at the wells. You shouldn't need help beating them up to reach your objective, and if you are lucky someone might already be there just hunting fire archons anyway.
This is the part where I remind you to spend those perk and power points you have accumulated, because the Fiery Pit is one dangerous place. Not only do enemies spawn pretty close to each other, which is annoying when going after mini bosses, but sometimes they spawn as SILVER enemies. Be sure to look before you leap! Also, the way the map is structured is that there is only one camp right at the start. This means there is a lot of travel time added on as your quests lead you deeper in.
The map is connected by central bridges patrolled by fire giants. You can avoid them by timing your crossing. Wait at the 90 degree angle of the bridge and just as the giant is about to step out, rush past and hop on the railing closest to you. The idea is to break his line of sight so he loses aggro. Alternatively just kill the giant.
Each area also has a "Making the Rounds" quest which you should take for extra XP. In the second and third areas, try ensure this task is completed before returning to base. Be especially careful about large groups of melee guys. If 5 skirmishers hit you it's most likely lights out. Use crowd control early to gain the initiative.
Lastly, you get a short quiz right at the beginning for some extra XP. While it's worth reading the lore, here's a quick recap that should get you by:
The Fire Cult is the enemy here, trying to awaken Maegera. The good guys, helping descendants of Delzoun who curiously called for outside help, have almost won and control half of city [fun fact: the other half of the city looks exactly the same] but due to low supplies need adventurers to finish off this war. Duergar are present too but are attacking everyone.
As usual, the color coding remains the same:
Green - Easy and/or fast.
Pink - If there's nothing else to do.
Red - Better to take a break than do these solo.
FIRST PATROL
Your first patrol mainly deals with the North East and South East parts of the map. Keeping this in mind, collect quests for the one spot to complete them faster and stop by the camp to resupply / sell / juggle quests every time you switch from one to the other. The Excavated Tomb is the instanced dungeon here but I recommend skipping it entirely as you'll almost always have something else to do topside.
*Grogbi Ironbeard
- Burning Sensations - collect bloodburn scorpion venom 5 kills NOT pickup (North)
- Connecting the Dots - investigate suspicious bodies (North)
- Geyser Samples - collect geyser samples (North. Do not attempt if Emberclaw is awake.)
- Mushroom Medic - collect 16 shrooms (North, mostly guarded by duergar)
- The Missing Spy - collect duergar runes (South pickup - points marked)
- Hostile Neighbors - defeat duergar 40 (North)
- Orders for Destruction - kill demolitionists and get orders (North AND South)
- Target: Olgi Fren'rah - Duergar Theurge miniboss (North) - expect nearby demolisionist team(s) to attack.
*Horath Pegra
- Crystal Coercion - Collect 18 pickup Bloodiron Crystals (South)
- Quell Hounds - kill 25 hellhounds (South)
- Traitorous Scum - Kill Duergar traitors (south)
- Target: Irestund - Fire Giant miniboss (South) - expect nearby Hellhounds to attack.
- Rescuing the Spy - rescue people from Excavated Tomb instance (South)
- Water Brigade - steal water barrels from Excavated Tomb (South)
SECOND PATROL
Your next tasks will be found on the Center and South areas of the map. The Burning Heart instance is the dungeon here, but again I recommend skipping. Enough to do top side. Or, use the time to take a break from all the intense fighting! Go have some cookies or milk or something! If the player is tired, you won't be as effective! :P
There's also a scavanger hunt quest here called "Services Rendered" to collect 25 mithril ingots. It can be annoying at first if you don't know where they are, but goes rather fast when you do. You can also switch channels to get ingots from places you've already visited. Look for them under wagons, in corners, on staircase bannisters, on the roof, ledges, anywhere and everywhere in the center you can jump to is fair game. To get you started here are nine of them, starting from the great hall directly across the camp.
1) Next to Center Throne
2) from Throne turn left, behind pillar
3) from Throne turn right, behind some curtains
4) from Throne turn around, under bench (probably first one you will pick up)
5) on long rod thing above the fire pit
6) South side staircase from great hall: nook in the wall
7) South side staircase from great hall: two along the left side (easy to spot)
8) North side staircase from great hall: On the south railing of a giant's bridge
9) North side staircase from great hall: On a pillar near #8. Just look down stairs and to the left.
*Farah Dahl
- Hot to Handle - collect 4 fire archon armor and dump them into wells. (South, lots of Archons near the wells)
- Snuff Out the Flames - kill 45 fire archons (Any, but I suggest South.)
- Tactical Ventilation - close 6 vents at the forge. (South)
- Target: Singe - Fire Archon Ash disciple miniboss. (South) - expect nearby archons to attack.
- Torch Bearer - collect 12 iron torches from cultists (South and Center). Middling drop rate.
- Contained Explosion - Silver HE: Rocks fall. (Center)
- The Burning Heart - Burning Heart Instance
- What the Blazes? - extinguish elemental blazes in Burning Heart instance
*Thannis Beke
- The Searing Sentinels - defeat 5 fire giant guards. Evade well. (Center)
- Spiker Striker - kill 10 flame spikers. (Any)
- Target: Flamberge - flame spiker mini boss (Center) - expect cultist group to attack
- Controlled Burn - collect scrolls / element cores + burn 5 (Center, lowish drop rate).
- Services Rendered - collect 25 mithril ingots. Pickup. See above. (Center)
- Trial By Fire - Take damage from fire archons (40 atks w/o death) - Requires patience. Ideally use the first archon you see just outside camp so you can hand this back in when done.
THIRD PATROL
Your final patrol deals with the North West and South West zones, as well as the West center. Unlike before, it doesn't really matter which zones the quests lead to as you will be visiting all those areas if you are going for the extra XP from "Making the Rounds". An easy highway to the North West exists where you just have to cross one bridge north, then follow the path West all the way, avoiding the patrolling bridge giants.
The instanced dungeon here is the Cistern, and in it you will encounter Vanifer, the flame prophet. Unlike the last two fools she is quite capable of killing you on her own, behaving much like an Ash Disciple. Her area attacks are extremely dangerous and failure to evade or block will probably result in death. She also starts with a bodyguard (take him out fast, but cleanly) and summons more adds as she takes damage. Due to this I highly advise luring her out of her chamber and using the whole rest of the dungeon space to fight her. I also recommend using single big hits for this fight, instead of swinging blades continuously so that you can concentrate more on evading.
Eventually, she will run away. :P
*Lucas Shaneway III
- Barrier to Entry - seal doors with magic barriers 6 (South West)
- Slaves to Business - rescue 8 dwarf slaves (South West)
- Cache on Delivery - dig up 8 caches. Marked. (South West)
- Financial Tracking - plant 10 magic coins. Marked (West Center)
- Pillage First - kill 30 cultists (Any)
- Target: Nuria Pyrellis - cultist flamewrath miniboss (South West) - if using ranged, can be fought without aggroing nearby cultists.
*Captain Montrose
- The Plumbing Job - fix 12 pipes at water pumps (all guarded, North West)
- Sabotage - defeat cultist saboteurs (North West, goes well with above)
- Brute Squad - defeat magma brutes (North West)
- Saddle Down - collect 10 fire strider saddles. Drops 100% from Strider Riders. (North West)
- Target: Captain Felcrest - miniboss fire strider. Many mobs nearby and he runs around a lot. (North West)
- The Cistern - fight Vanifer in Cistern instance
- Ring of Fire - Vanifer's ally in Cistern instance (then Vanifer herself)
Once that is all done the last thing to do is to pick up the Seed of Fire, guarded by a few measly archons at the wells. You shouldn't need help beating them up to reach your objective, and if you are lucky someone might already be there just hunting fire archons anyway.
Sunday, 3 May 2015
Neverwinter Online: Reclamation Rock Vigilance Guide
[Part of my Neverwinter Online: Vigilance Quest Guide.]
Reclamation Rock is home to very dangerous bulettes, but it also has the easiest starting area of all the zones to complete. Personally, I've been using it as extra XP for my characters who already have finished the campaign. This guide will be using the same color coding as last time.
Green - Easy and/or fast.
Pink - If there's nothing else to do.
Red - Better to take a break than do these solo.
BEACH CAMP
My favorite spot as it gives easy access to quest givers and to traveling back out to the world map. The instanced dungeon here is the Crypt of Ascension, and if you do decide to go in there you will find the entrance behind an illusionary rock face. Make sure you have both quests to make the trip more worthwhile if you do attempt it.
*Dassar Truebow
CITY CAMP
Ah the city. The grind of this zone begins now. Fortunately there is a secret tunnel (near one of the scouts) that leads up to the tavern to save travel time. There's also a new secret tunnel that leads from the cathedral to Scar Keep. From inside the cathedral if you are facing the doors, turn right and look for stairs down. The instanced dungeon here is the Underlift, and because the quest selection here is so poor I actually do recommend going in there (with 2 quests) to save time. The crazy bomb throwing dwarf boss in there isn't too bad. Just kill the adds and you will win. I sure hope you know how to tell the difference between a mimic and a treasure chest though (cursor has bag = regular chest).
*Brother Satarin (Cathedral)
MEMORIAL FIELDS
The most annoying area of all the zones purely because of it's crappy quest choices and tough or rare opponents. Expect to be here awhile. The instanced dungeon here is the Lost Tomb which happens to be where the Earth Prophet, Markos Unrayle is encountered. He has a pretty big room to fight in but isn't that much of a threat. Kill his adds while fighting (so kill him slowly) or lure him near the entry so you can murder him with ease. Because of the low quest choices here, I do recommend visiting this at least once (with two quests).
There are also Slaad (frog men) present who are numerous and pretty annoying to fight (long to kill/use up too much resources), so I try to avoid them.
*Captain Dunfield
Once that is all done, you just have to pick up the Earth seed and are finished with this area. That might be a little challenging though as one of the Blackmantle Generals sits right on top of it with two or three groups of lackeys. Get a buddy to help you clear it out or channel hop to find one that has recently been cleaned out. If you skipped the last part of Drowned Shore like I suggested, it is time to go back there and curb stomp everything.
Reclamation Rock is home to very dangerous bulettes, but it also has the easiest starting area of all the zones to complete. Personally, I've been using it as extra XP for my characters who already have finished the campaign. This guide will be using the same color coding as last time.
Green - Easy and/or fast.
Pink - If there's nothing else to do.
Red - Better to take a break than do these solo.
BEACH CAMP
My favorite spot as it gives easy access to quest givers and to traveling back out to the world map. The instanced dungeon here is the Crypt of Ascension, and if you do decide to go in there you will find the entrance behind an illusionary rock face. Make sure you have both quests to make the trip more worthwhile if you do attempt it.
*Dassar Truebow
- Adepts of Ascension - rescue acolytes
- Scouting Ascension - kill enemy scouts
- Black Earth Survey - investigate / disrupt training camps
- Cult Infiltrators - talk to infiltrators (usually on ground level)
- Stealing Their Mettle - steal cult weapons
- Scouting the Forest - talk to ranger scouts (usually on higher ground)
- The Heroic Way - complete HE, rescue merchant
- Tombs of the Watchful - Visit 5 tombs (open world) fight inhabitants, interact with something.
- H1 - Heroics - As of this post, currently bugged and finishes by itself: Free XP.
- Deployment Orders - get orders (pickup or mobs)
- Training Manuals - get training manuals (pickup or mobs)
- Cult Connection - gather journals from cultists (goes well with below)
- Fighting the Earth - kill Rock Claws (the West cultist camp has 7 in the vicinity)
- Grinding the Gravel - kill mercs and throwers Leading the Avalanche - kill elementals (doesn't really mesh with any other quest)
CITY CAMP
Ah the city. The grind of this zone begins now. Fortunately there is a secret tunnel (near one of the scouts) that leads up to the tavern to save travel time. There's also a new secret tunnel that leads from the cathedral to Scar Keep. From inside the cathedral if you are facing the doors, turn right and look for stairs down. The instanced dungeon here is the Underlift, and because the quest selection here is so poor I actually do recommend going in there (with 2 quests) to save time. The crazy bomb throwing dwarf boss in there isn't too bad. Just kill the adds and you will win. I sure hope you know how to tell the difference between a mimic and a treasure chest though (cursor has bag = regular chest).
*Brother Satarin (Cathedral)
- Posting the Truth - put up posters. If contested by other players, switch channel.
- Warding off Madness - gather materials to reinforce wards (tainted water x4/archon dust x4)
- Holding the Streets - draw out cultists on street. Use corners for cover or leave quest circle if hard pressed.
- Rocky Foundations - kill 40 earth elementals. Not too bad since the marked zone has around 20. Archons count.
- Rock Tumbler - kill galeb duhr. (Rare to find in the area, especially if contested)
- Voices of Stone - kill 10 blackmantle sorcerers (more rare than above, even with the new summoning scrolls)
- Rescue Mission - rescue workers from Underlift
- The Verge of Collapse - stop bombs in Underlift
- Hedging against Plague - not a vigilance quest (doesn't take up a slot), but good for bonus XP. Collect notes from cultists (100).
- Call to Alms - collect alms (drops anywhere and pickup from zone) then hand them out
- Recovering Reconstruction - collect construction supplies (drop / pickup) and rebuild
- Hero of the City- complete ANY HE (good combo with below)
- Shaking up the Town - complete Earthquake HE - High odds of others doing this as it is right outside the cathedral. If currently active, try get this and Hero of the City to complete both.
- Hostile Induction - Complete Press Gang HE - can be difficult without aid or sniping from cliff top.
MEMORIAL FIELDS
The most annoying area of all the zones purely because of it's crappy quest choices and tough or rare opponents. Expect to be here awhile. The instanced dungeon here is the Lost Tomb which happens to be where the Earth Prophet, Markos Unrayle is encountered. He has a pretty big room to fight in but isn't that much of a threat. Kill his adds while fighting (so kill him slowly) or lure him near the entry so you can murder him with ease. Because of the low quest choices here, I do recommend visiting this at least once (with two quests).
There are also Slaad (frog men) present who are numerous and pretty annoying to fight (long to kill/use up too much resources), so I try to avoid them.
*Captain Dunfield
- Black Earth, Stone Heart - stop ceremonies in Lost Tomb
- Stay of Execution - rescue captives from Lost Tomb
- Stone by Stone - Kill 3 Blackmantle Generals. All are casters. Not all are equally defended. Choose targets wisely.
- By the Horns - hunt 6 gorgons. Slightly rare, one in Graveyard and one next to graveyard. Alternate as they respawn or channel hop.
- Landshark - hunt 8 bulettes. Easy to find, but very dangerous.
- Defying the Rock - HE Encounter. Very tough to win. Concentrate on the non-silver/golds on the wings to up the kill count quickly. Better odds for randoms to assist than the HE below.
- Bannermen Forever! - Raise banner to spawn a Silver HE. Defend.
- Taking Measures - take 500k damage and live. 15 min limit to complete. As a rogue and ranger I couldn't do this. Might be ideal for Cleric / Pally.
- In Memorial - Check on Graves - Easy.
- Stolen Memories - collect mementos (drops). Good combo with Defying the Rock.
- Memorial Heroes - complete grave robber Silver HE. - Soloable but be careful.
- Toad Bait - Close Slaad Limbo Portals. Often contested by other players. Best right AFTER the Slaad invasion event finishes.
- Toadkiller - Kill Slaad, can find many to the East along the outer cliff.
Once that is all done, you just have to pick up the Earth seed and are finished with this area. That might be a little challenging though as one of the Blackmantle Generals sits right on top of it with two or three groups of lackeys. Get a buddy to help you clear it out or channel hop to find one that has recently been cleaned out. If you skipped the last part of Drowned Shore like I suggested, it is time to go back there and curb stomp everything.
Friday, 1 May 2015
Neverwinter Online: Drowned Shore Vigilance Guide
[Part of my Neverwinter Online: Vigilance Quest Guide.]
Welcome to the Drowned shore. There is a repeating quest here called "Gutting Fish" from the Zhentarim Agents which you should always get for bonus XP. You'll complete it a few times while doing the vigilance tasks. I'll be using colors to indicate what quests should be prioritized and which should be avoided.
Green - Easy and/or fast.
Pink - If there's nothing else to do.
Red - Better to take a break than do these solo.
ENTRY CAMP
Main thing to note here are the mines. Glimmerstone is filled with lizardmen and some sea hags. Silverdrip is filled with sea trolls and many sea hags. These two are "open world" dungeons in that other people can just enter your same instance. The main trick here is to coordinate your tasks when you go in one or the other. Goldseeker's Folly is the INSTANCED dungeon, which means you will not get randoms helping you out. Don't go in there unless you either have both quests for that area and/or have the mandatory task after you've completed your first 16.
*Alinda Greenwood
HILL CAMP
The most efficient way to clear this part I found was to AVOID THE KEEP in the Northeast of the map as there's a lot of pointless and dangerous fighting in there. After completing your 16 tasks here you will get a mandatory quest to raid it anyway. Ideally bring the two Sea Hag's Hold quests when you do make the trip to maximize your time there. Be careful of a lizardman ambush at the pool part of that instanced dungeon too.
Most of the tasks here involve killing lacedons and hags, or collecting merchant goods. ALL of these can be found near the camp. Collect merchant goods from the cultist camp just to the right of the Hill camp (stand at the fire at face the road). Ten steps and you are there.
*Xalliana
After you have finished these and the mandatory quest I suggest you go to Reclamation Rock and do the quests there, coming back afterwards to do the final area with better gear and feats for an easier time. Your call though.
SEA ELF CAMP
The main problem here is that most of the quests lead across the map to the beach, wasting a bit of time on travel. Make sure that the four quests you pick up are completed before coming back. The Inn tasks on the other hand, are right beside the camp. If you do those, complete them and hand them in / pick up replacements before going to the beach. A word of warning with the Inn - on the main level, enemies from upstairs can and will aggro you so expect to fight more than one enemy group when you get there.
*Guard Harris
After finishing that, you just have to do a few tasks for the Sea Druid hiding in a tree then you can go fight Gar Shatterkeel in the Sea Cave instance. Like most Neverwinter Bosses, he summons adds as he loses HP. They are finite, so if you kill the adds you will win eventually (Gar is basically a caster so most of his attacks are easy enough to evade, just kill him slow). Alternatively, just lure him far away from his starting spot to eradicate him at your leisure.
Once that is done, just one more trip through the "hard water" is required to collect the Seed of Water and you are done! I wonder if anyone has actually drowned in there.
Welcome to the Drowned shore. There is a repeating quest here called "Gutting Fish" from the Zhentarim Agents which you should always get for bonus XP. You'll complete it a few times while doing the vigilance tasks. I'll be using colors to indicate what quests should be prioritized and which should be avoided.
Green - Easy and/or fast.
Pink - If there's nothing else to do.
Red - Better to take a break than do these solo.
ENTRY CAMP
Main thing to note here are the mines. Glimmerstone is filled with lizardmen and some sea hags. Silverdrip is filled with sea trolls and many sea hags. These two are "open world" dungeons in that other people can just enter your same instance. The main trick here is to coordinate your tasks when you go in one or the other. Goldseeker's Folly is the INSTANCED dungeon, which means you will not get randoms helping you out. Don't go in there unless you either have both quests for that area and/or have the mandatory task after you've completed your first 16.
*Alinda Greenwood
- Riptide Molly - Sea Hag miniboss wandering outside the mines
- Healing Harvest - gather vine blooms and shrooms (shrooms from the mines)
- Herbal Malady - Collect Gurglewort Sap, add it to Humanoid food crates in Glimmerstone or Silverdrip
- Alinda's Bounty - Collect Olhydra's Emblems (drops)
- Mysterious Symbol - find symbol (drop) check it against book
- Sea Hag Slaying - kill sea hags
- Heroic Encounter: Breaking the Ice
- Deepclaw - sea troll miniboss in Silverdrip mine
- Needful Things - Supply crates from Silverdrip or Glimmerstone
- Silver Strike - get silver ore from Silverdrip
- Sea Trolling - Kill sea trolls
- Goldseeker's Folly: Mine Rescue - rescue miners
- War Machines: Destroy 3 war machines at nearby keep
- The Tidemaster - boss in Glimmerstone
- Reptillian Reavers: Hunt Lizardmen
- Shock Troops - kill trolls in Silverdrip AND lizardfolk in Glimmerstone (only in the mines)
- Heroic Encounter: Ranger Rescue - at nearby ruined fort
- Goldseeker's Folly: Rogues Gallery - kill minibosses in the mine
- Heroic Encounter: Subterrenan Surge - Gold level Heroic, tucked away in a dungeon
HILL CAMP
The most efficient way to clear this part I found was to AVOID THE KEEP in the Northeast of the map as there's a lot of pointless and dangerous fighting in there. After completing your 16 tasks here you will get a mandatory quest to raid it anyway. Ideally bring the two Sea Hag's Hold quests when you do make the trip to maximize your time there. Be careful of a lizardman ambush at the pool part of that instanced dungeon too.
Most of the tasks here involve killing lacedons and hags, or collecting merchant goods. ALL of these can be found near the camp. Collect merchant goods from the cultist camp just to the right of the Hill camp (stand at the fire at face the road). Ten steps and you are there.
*Xalliana
- The Render - lacedon boss
- Undead from the Deep - lacedons
- Drowned Menace - kill lacedons
- Green-Eyed Monsters - get a hag eye
- Attack on Blackdagger Keep - kill enemies, destroy supplies at the keep.
- Heroic Encounter: Pillaging the Pillagers - HE located deep in the keep.
- High Road Warning - post signs
- Getting Goods - recover trade goods from monsters (use the nearby cultist camp)
- Taking Stock - recover merchant wares (from keep OR mobs, use the nearby cultist camp)
- Heroic Encounter: Merchants in Distress
- Crushing the Crushing Wave - slay cultists
- Maelstrom - mini boss cultist in keep area
- Hateful Horrors - kill green hags
- Heroic Encounter: Cultist Ambush (very near the camp, high chance for assists)
- Ranger Reports - gather reports
- Scaly Persuasion - kill cult agitators
- Life Guarding - free captives (found in watery lacedon areas)
- Mossy Meg - hag boss just outside the keep
- Sea Hag's Hold: Down the Drain - drain pool
- Sea Hag's Hold: Worse Than Death - free captives
After you have finished these and the mandatory quest I suggest you go to Reclamation Rock and do the quests there, coming back afterwards to do the final area with better gear and feats for an easier time. Your call though.
SEA ELF CAMP
The main problem here is that most of the quests lead across the map to the beach, wasting a bit of time on travel. Make sure that the four quests you pick up are completed before coming back. The Inn tasks on the other hand, are right beside the camp. If you do those, complete them and hand them in / pick up replacements before going to the beach. A word of warning with the Inn - on the main level, enemies from upstairs can and will aggro you so expect to fight more than one enemy group when you get there.
*Guard Harris
- False Priests - kill cultists in Inn (careful once you exit the basement)
- Avenging the Guard - kill cultists (30)
- Beach Combing - collect salvage (pick up)
- A Seafood Diet - collect crab meat (10 drops - not all crabs have meat though), eel grass (pickup 5)
- Slade the Thricedrowned - miniboss cultist
- Stolen Memories - recover mementos (drops x5) Abysmal drop rate.
- Breathless - recover necklace of air breathing (drop x1) Slade Thricedrowned usually has it.
- Surge - miniboss water ele
- Stemming the Tide - kill water eles (20)
- Water Warriors - kill water eles (24)
- Heroic Encounter: Aquatic Elf Abduction - HE silver level
- Heroic Encounter: Fountain of Fear - HE gold level, hard
- Waterbourne Warning - deploy 3 buoys at the beach
- Hullbreaker - miniboss troll
- The Ravenous Host - kill lacedons (12) - probably tired of them by now though :P
- Heroic Encounter: No Room at the Inn - HE (silver tough, starts at main floor so multiple groups right away)
After finishing that, you just have to do a few tasks for the Sea Druid hiding in a tree then you can go fight Gar Shatterkeel in the Sea Cave instance. Like most Neverwinter Bosses, he summons adds as he loses HP. They are finite, so if you kill the adds you will win eventually (Gar is basically a caster so most of his attacks are easy enough to evade, just kill him slow). Alternatively, just lure him far away from his starting spot to eradicate him at your leisure.
Once that is done, just one more trip through the "hard water" is required to collect the Seed of Water and you are done! I wonder if anyone has actually drowned in there.
Thursday, 30 April 2015
Neverwinter Online: Vigilance Quest Guide
With Module 6: Elemental Evil came a whole bunch of repetitive "Vigilance" quests and now that I've gone through the whole lot twice I thought I might make a little guide to help clear your 16 (tasks) x 3 (areas) x 4 (zones) quests as efficiently as possible. In subsequent posts I'll be going into each zone by detail, but for now just some general info.
Clear as mud? Next up, we'll start looking at each zone in detail. :)
Drowned Shore Vigilance Guide
Reclamation Rock Vigilance Guide
Fiery Pit Vigilance Guide
Spinward Rise Vigilance Guide
- You can "properly" start Elemental Evil upon reaching level 60. Talk to Sgt. Knox.
- I suggest doing the first three intro quests with Minsc as it introduces you to the new mobs.
- You can only carry 4 vigilance tasks at one time.
- In theory you can finish a set of 16 tasks by doing the same quest 16 times but that isn't a good use of time.
- If you have finished quests and are near the quest givers, go back and hand them in / pick up new ones.
- Each area has 16 vigilance tasks available but only in batches of 8 which switch over each hour.
- Each area offers an instanced dungeon. Only go in if you have the two dungeon quests (one before the hour and one after).
- Personally, I try skip the instanced dungeons (if solo) as you can get more done outside them.
- It is faster and easier to clear quests in an organized team (carrying the same quests).
- Reaching level 70 gives you an artifact off hand weapon. Talk to Sgt. Knox. (thanks Shintar!)
- Finishing the Vigilance cycles of Spinward Rise (last area) gives you an artifact main hand weapon.
- It is possible just to level up to 70 elsewhere and charge Spinward Rise directly, skipping the other zones.
- Don't forget to buy potions and sell loot during down times when there are no (decent) quests available.
Clear as mud? Next up, we'll start looking at each zone in detail. :)
Drowned Shore Vigilance Guide
Reclamation Rock Vigilance Guide
Fiery Pit Vigilance Guide
Spinward Rise Vigilance Guide
Saturday, 18 April 2015
Today I Smiled: Too Much of a Good Thing?
My little cousin stayed over for a night of boardgames and did we go through a whole bunch! Won two rounds of Pandemic (easiest level then easiest with mutation), lost two rounds of veteran level Flash Point: Fire Rescue, lost one and won one novice round of Forbidden Desert, and surprisingly won two games of Eldritch Horror, without any detective casualties, against Azathoth and Yog-Sothoth!
We then moved onto more competitive rounds of regular playing cards and a game my cousin calls "Chinese". She won 4 out of 5 of those, followed by me winning two rounds of Bluff and finishing off with two games of Lords of Waterdeep where once again my wife proved she was the ultimate Lady of Waterdeep winning both games by a huge margin. As you can imagine a little bit of board game fatigue has since followed. :P
I've also finally gone through all the "vigilance quests" (just shy of 200, counting repetitions) introduced in Neverwinter Online's Elemental Evil and am now level 70 on my rogue. At least you get a lot of good gear for going through all of that - an artifact main hand and off hand weapon to boot! I normally put video links at this point, so for those who don't play or haven't reached any of the dragons, here's a clip taken by my brother. That's me with the knives and the weird helmet! Or, if that doesn't interest you - have a trailer to Batman vs Superman instead. :D
Hope you all have a great day!
Thursday, 9 April 2015
Neverwinter Online: Beyond Elemental Evil
Neverwinter Online: Module 6 (aka "Elemental Evil") is out and it increases the level cap to 70. While there isn't a "campaign" (that I can see anyway), there are new adventure zones to level up in featuring enemies of the four planes (earth, water, fire, and air). Talk Sergeant Knox at Protector's Enclave to get that quest line started. If you have a free character slot or are new to the game, you may also want to try out the new paladin class.
What it doesn't make clear is that the new level cap also has changed ALL the old campaigns. Sharandar, the Dread Ring, Icewind Dale and the Well of Dragons now have level 70+ enemies. Expect a very difficult time if you decide to continue doing quests there as a level 60!
I also have a feeling we might be seeing a Spelljammer module sometime in the future. Why?

That's Minsc, who some players may have encountered in Baldur's Gate. He has a pet named Boo.
For now though, there are lots of crazy elemental forces that needkilling rebalancing which will keep everyone busy. When the foundry comes back up, you can try scratch the Spelljammer fix with this player made quest (not one of mine):
'To Infinity, and BEYOND!'
NW-DSQ39N5SJ
I haven't tried it myself yet, but at least I'm not the only one with Spelljamming in mind! Let's kill some Neogi! :D
What it doesn't make clear is that the new level cap also has changed ALL the old campaigns. Sharandar, the Dread Ring, Icewind Dale and the Well of Dragons now have level 70+ enemies. Expect a very difficult time if you decide to continue doing quests there as a level 60!
I also have a feeling we might be seeing a Spelljammer module sometime in the future. Why?
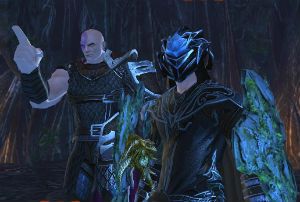
Because of this bald guy behind me.
That's Minsc, who some players may have encountered in Baldur's Gate. He has a pet named Boo.
- Boo is a minature giant space hamster. Giant versions power vessels in Spelljammer.
- Cryptic's other game is Star Trek Online. A space game where players own star ships.
- The air ship in pirates skyhold has gotten a lot of upgrades since I last saw it.
- Owning / Upgrading a vessel would cause a lot of people to invest in more Zen / Astrals / Time. Cryptic likes money.
- Spelljammer is not in the faerun universe? Neither was the base elemental evil (World of Greyhawk).
- Being able to Spelljam might open doors to other D&D realms such as Greyhawk or Krynnspace!
For now though, there are lots of crazy elemental forces that need
'To Infinity, and BEYOND!'
NW-DSQ39N5SJ
I haven't tried it myself yet, but at least I'm not the only one with Spelljamming in mind! Let's kill some Neogi! :D
Subscribe to:
Posts (Atom)