The last of the
Shakespearian story-arcs, this supposedly revolves around "Macbeth" but has almost nothing to do with the original prose. Pity I was hoping they'd include "Titus" but I guess that was too much? The difficulty ramps up a fair bit here, forcing you to fight numerous Peaca spawn in big numbers so it pays to have a bunch of highlevel buddies by now. Like before your decisions will affect the ending.
The Witching Hour (solo)Scathach beach and cave are full of really high level monsters, fortunately you don't need to fight any! Just mount up (I assume you have one by now) and ride past till you reach the shipwreck.
Death of Someone Important (solo as William)Huzzah, you get to finally meet King Ethan MacQuill II for all of 1.2 seconds! Firstly you need to deal with Morrighan and her cronies though. Given your character has Rank 1 in everything now you shouldn't find any problem beating the mobs here. Just follow the mission prompts.
Assassin (solo)You will face three fleet footed elven assassins here (damn you Castanea) all of whom have heavy stander and aggro far, pretty much at the start of the mission. One of them comes with a bow, and all of them will ignore the NPC you are supposedly protecting in favor of killing you first! Trans/demi early and mana shield up in case they land hard hits on you. If you have time you can summon Adniel but if you are prepared for them you should be ok with standard god skills - if aligned with Morrighan use Wings of Eclipse first to take more hits, if you've reverted back to Neamhain use Shadow Spirit on yourself to hit all of them followed up with fury of light and spear of light.
Even Ezio would be caned with your demi-god skills!
From Beyond (solo as William)Been awhile since you've visited this place, and there's a new grave for you to see. A group of undead Peaca scum will ambush you here so again be ready to fight and thunder as needed. The hollow knights are dual wielding swords which actually makes them -less- dangerous since they have no bows but treat everything here with caution.
Necessities (solo as William)You'll face Golems, Aonbharrs (careful of the cheating floating stones), and Balrogs in this mission. First two groups are easily enough dispatched with thunder while the Balrogs (gargoyle AI) will probably not live long against your smash-mill - even if you are using a pickaxe at this point. Once they're dead it will start to rain so dig those firey rocks and complete the mission.
Truth Helm (solo as William)After killing -all- that other stuff 10 stupid alchemists stand in your way. Really? If you need help here you're doing something wrong. :P
Secret Meeting (bring high level help)A very tough mission so you'd best bring a strong team. Ironically it is easier if you (party leader) remains talking to the NPCs at the top of the watch tower until your friends kill the three, rather large waves of Peaca monsters pouring into the grounds below. If you decide to join them then Andras, Odran, Padan, and Sinead will join the combat but should any of them die the mission will fail. Prep potions before attempting this and keep your mana shield on. Also avoid using normal attacks (almost everything has stander) and try stagger your trans/demi (don't do them at the same time) to match with what your allies are doing so that you don't all use up the extra power during the first wave - although with a strong team you'll probably finish this mission with both still active. Should you keep disconnecting then you may need to run the mission with fewer people. Also if it is still too tough find someone of a lower level to be party lead. Rare to find anyone on INT or below at this stage though.
The Third Guardian (solo)Another visit through Rundal with not much new in terms of enemies, unless you are on hard mode in which case there may be some over powered red spiders and skeleton wolves in here for you. They won't be any smarter though so just fight as normal and prepare to counter or windmill as needed. Don't underestimate the boss - infact it is probably safer to over-kill her and trans/demi as your opening move. Shakespeare will try help here, just use him as bait. Most of Merrow's strongest attacks are evadable if you aren't busy using long animated combat moves like smash or windmill (you can't knock her down anyway) - she has a forward wave attack and an area attack that illuminates itself with giant circles which you should stay out of. Harder to evade her smash and counter though. Demi-god skills are probably the best way to eliminate her quickly.
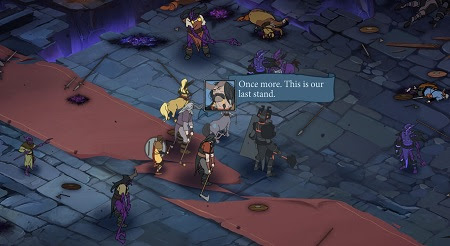
Blood and Death (bring high level help)You'll have a big NPC army to help you out here but what you most need is a full party. One of them (the oldest one creation wise) is going to be Shakespeare with R1 everything and will help in making things go smoothly. You must fight through tons of Peaca scum to reach the castle and a few more within, and the party leader must survive both boss fights (first against a lich and then against obvious main baddie) for the mission to be completed. Easiest way to do this is for him or her to hang back and let his faithful party members do the majority of killing at those points (stay out of the throne room and do not "rest"). Apart from the things you've already faced now there are these as well (all multiaggro at this stage):
Giant Firefly - With melee immunity, good defense against magic and range and a huge deadly windmill radius, you'll want to campfire magnum shot these things from far far away.
Demilich - may be hard to lure him away from his buddies but given that he teleports you may be able to isolate him. He will have lots of HP and can chain cast advanced magic (obviously). Probably better to use demi-god skills on him to end him quickly, team ganking windmill (he can/will teleport behind you) is probably the way to go.
Ghasts - summoned by the main boss they cannot be knocked down, have a ton of HP behind very high defense and do major damage. Group windmill to keep them busy. Actually you may just want to group windmill everything in the final room anyway as there's not much room to do anything trickier. :P
Main Boss - has a number of advanced skill too such as final hit, life drain and assault slash. Party windmill spam him against a wall to keep him off his feet, and his summoned Ghasts in check. Only Admiral Owen will be assisting at this point and if he dies it is game over.