Showing posts with label Orzammar. Show all posts

Sunday, 17 October 2021

Tales of the Blight II: Blackwall

[Part of my Dragon Age: Inquisition play through. Spoilers ahead!]


Sounds like legitimate banditry.
 
As the only Grey Warden in the Inquisition, it was no surprise that I'd be the one sent to secure an alliance with the dwarves of Orzammar especially now they've asked for aid with all the recent earthquakes disrupting their trade routes and reopening passages for the darkspawn to pour out from.

Soon enough I made contact with a unit of their "Legion of the Dead" in the Deep Roads. They're a good bunch. Tough in a fight. Fearless. Two of them, Renn and Valta, decided to come along to try determine the unnatural nature of the quakes. Down and down we went, killing darkspawn by the dozens, until we reached a place of darkness that even the darkspawn knew better than to enter.

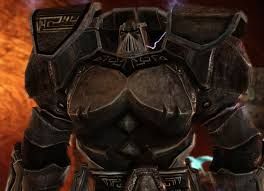
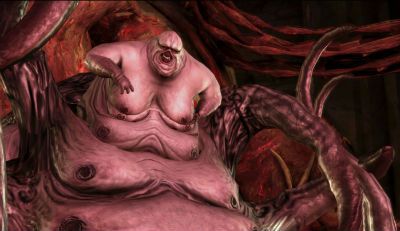
Renn died there in that darkness, against "pure" dwarves infused to lyrium armor. Valta and I pushed on, found what they were guarding: a lyrium heart which Valta thought to be part of a sleeping titan. Somehow she managed to calm it down, stopping the quakes it was causing. She chose to stay with it, with them, to let me return to the surface. She fulfilled her duty. Orzammar was happy with this result, accepting the Inquisition alliance.

Upon my return, Bull asked how I was still alive. I told him the Maker has a soft spot for fools.

Insight: I didn't realize the Deep Roads is a DLC which means it is WAY harder than other content. From it I learned early on you can actually revive downed companions which makes a rogue's invisibility very useful. Doubly so in that you can abuse enemy leashing, and the fact they don't heal. Fights might take awhile but as long as you can get far enough away to get everyone up, you can make progress.

Sunday, 16 November 2014

Tales of the Blight: People of Importance

[Part of my Dragon Age: Origins play through. Spoilers ahead!]

The assembly of lords at Orzammar listen to the tale of how I sort of killed two of their Paragons and destroyed one of their legendary artifacts and are then forced to swallow that I get to pick who their next king is, regardless of their previous voting. Obviously I chose Harrowmont and Bhelen and his supporters get so upset that they are moved to violence right there and then! After all of them violently die, Harrowmont agrees to assist in the war against the darkspawn. I even convince the Dead Legion commander to do the same.

Damn this thing is heavy!

I take a tour of the palace afterwards and find a poisoned noble lady within. Fortunately she doesn't need some hard to get holy ashes, just reagents and herbalism to sort her out. With nothing left to do here I decide to first visit Denerim again to try finish up any out standing side quests such as getting drake and dragon scale armor constructed, as well as meeting a boss figure of the Antivan Crows assassin group who tries to hire me. Needless to say I make sure he and his cronies do not leave the encounter alive.

Since lots of areas are still closed off to me, I decide to ultimately return to Arl Eamon and get him to call for the Landsmeet and travel with him to his estate back in Denerim. Lots of back and forth, I know! Loghain, his female body guard, and Arl Howe come to welcome us right away in person. After exchanging a few, not so polite or subtle words they leave and it's time to work on uniting the land!

Friday, 14 November 2014

Tales of the Blight: I'll be Back

[Part of my Dragon Age: Origins play through. Spoilers ahead!]

Back at Orzammar we have to execute a few of Jarvia's supporters before finding our way back to the Deep Roads. Thankfully with most of the darkspawn heading topside, nothing here has respawned and it is just a simple task of jogging all the way back to that Brood Mother who stopped us last time. She has no such luck now as we are higher level, better equipped, and literally are exploding with health potions. Morrigan even has a group healing spell now so that fat tentacled thing is toast in no time!

Eventually we find Paragon Branka who is still alive, having spend all this time using her own clan to test the traps Paragon Caridin left to guard the Anvil of the Void, which Branka is obsessed about. She forcefully enlists us too, and after fighting through a ton more darkspawn (because that's not getting old *ironic voice*) I finally reach the easily disarmable traps (for our level) and find said anvil and Paragon Caridin who has now had his soul put into a golem.

For the Emperor?

Turns out this anvil requires the death of dwarves to be put into golems and that doesn't sit well with Caridin or myself, which makes us ally against Branka when she comes bouncing along to try claim it for herself. After she is killed by her ex-husband Oghren, I help caridin to destroy the device by... hammering it? Um. Ok. But not before he fashions a fancy crown to help me sort out the dwarf king issue back at the city. Caridin then offs himself by jumping into some lava. Very terminator.

Thursday, 13 November 2014

Tales of the Blight: Not so Simple

[Part of my Dragon Age: Origins play through. Spoilers ahead!]

The only thing left between us and the Urn of Andraste's Sacred ashes is a gauntlet meant to test pilgrims who have come to pay tribute, and boy what scummy tests they are. The first room is one of riddles which is solved easily enough if you listen to the question enough times. Then there's a part where you fight your doppelganger (because Andraste is a sadist I guess) followed by an irritating bridge building puzzle that took me ages to solve.

I hate you, logic puzzle!

Only after all of that do we finally get to our objective, and with a pinch of the sacred ashes in hand we return immediately to Redcliffe and cure Arl Eamon who is brought up to speed rather quickly about all the events that transpired while he was in his coma. He's a pretty cool dude, and is not too upset about me hacking up his demon possessed kid earlier. He even suggests calling a Landsmeet at Denerim to get all the lords to rally together and put an end to Loghain's civil war, as well as putting Alistair forward as king.

I say that's all well and good and to go call it, but he refuses until I use up all the treaties I'm carrying to get more allies. Damn, he means the dwarves doesn't he? Oh well. Without any choice we head back to Orzammar, dealing with random darkspawn forces on the road AND in camp on the way. Looks like the archdemon is starting to think we're a threat if he's sending monstrous assassins after us.

Sunday, 9 November 2014

Tales of the Blight: Sod the Dwarves

[Part of my Dragon Age: Origins play through. Spoilers ahead!]

Kinda getting sick of all these tunnels and darkspawn now, and as we come across the great bridge of the Dead Trenches where we assist a handful of Dead Legion dwarves cross into the enemy line we see the staggering number of darkspawn marching below - following the call of the "archdemon" dragon (who luckily doesn't notice us despite having some sort of psychic link). The dwarves aren't that keen on helping us find Branka, whose trail leads deeper into enemy territory so it's soon just my squad again making slow progress through the irritating zig zag path.

The design also lends itself to cheap traps like spawning enemies out of thin air to flank you. Fortunately all are triggered harmlessly by my solo stealth scouting. After a lot of effort we finally reach the end and find a crazed dwarf (second crazy one we meet down here) who is going loony from not just eating darkspawn but also her fellow kin. She blames all of this on paragon Branka whose trail leads deeper still. Only one problem, there's a hideous tentacled broodmother boss in the way.

Come to mamma!

Try as we might, we simply don't have the firepower or health potions to shave off the last 5% of her life. Eventually I simply throw my hands up in the air and yell "Sod the dwarves!" and take my team not just back to Orzammar, but elsewhere entirely. I'll just let the short folk vote for their next king and force him to acknowledge the treaty, surely that would be less work.

Friday, 7 November 2014

Tales of the Blight: Gladiator

[Part of my Dragon Age: Origins play through. Spoilers ahead!]

Next stop was the Frostback Mountains and the gateway to the dwarven city of Orzammar. After eliminating some bounty hunters on the road we find the gates to the city closed due to the death of their king. There's also a small group of Loghain's men trying to get in to gain favour but while they are denied, my team bearing the Grey Warden treaties are accepted. This causes some dispute and the deaths of Loghain's men.

Upon entering Orzammar I quickly learn about the caste structure of the dwarves, and find that in the dirt district dwarven thugs are just as pathetic as thugs of any other race. After offing a smuggler and catching a strange rabbit-pig for Leliana which she names Schmooples, it's time to get down to the business of sorting out an alliance here and that means expediting putting a king on the throne.

The candidates are Lord Harrowmont, who the previous king expicitly wanted to reign after him, and Prince Bhelen, the actual son of the former king. I'm not really sure at first who to support until I find out that Bhelen's camp wants me to lie for him. By default this means I support Harrowmont and to prove it I take part in the "Proving" arena tournament on his behalf and win the entire contest, including the optional "lesser games" (which are actually harder).

How to beat dwarf warriors: Stand a little to the side. :P