Showing posts with label Classes. Show all posts

Monday, 6 August 2012

Generation 12 Tips (Part One) - Last of the Alchemists

Welcome to my quick tips for G12! This guide assumes you've read my previous classes and have certainly fought through the nightmare of the previous story arc. In comparison, this one isn't so bad but can still be tough in a few spots. Let's just quickly run through the combat bits:

Investigate the Homunculus Experiment (solo)
Nothing new for you here - you've been in tougher spots. It's a city mission too, which means you can call for dragon support or make use of the space for ranged attacks.

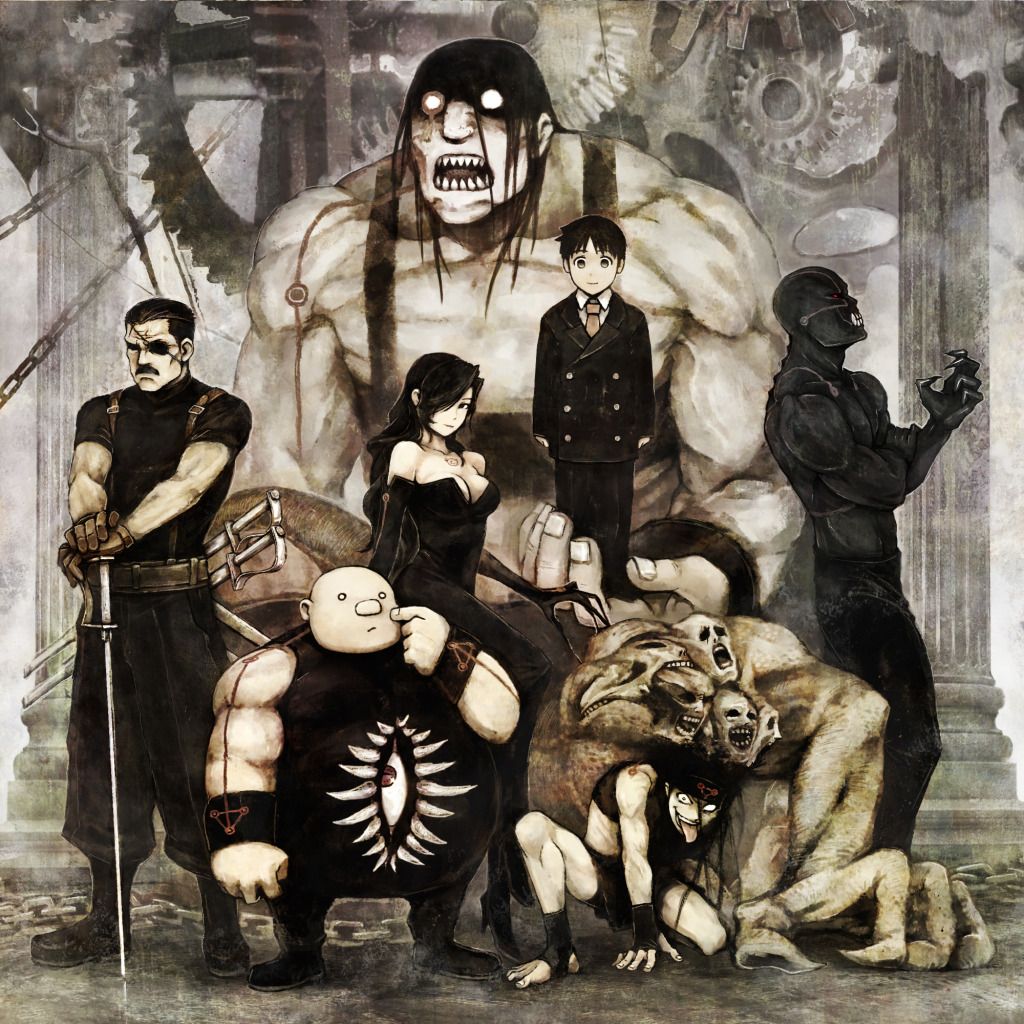
Don't worry, it's not these guys.

Alchemy Society (fastest solo)
Another outdoors mission with plenty of room to move. Other than the old shadow army guys you'll also find some arat boars (pig ai) and arat deers (shadow shire ai) that aggro pretty quick when you are close. The deer is more dangerous than the piggy but seriously if you are getting killed by Bambi then you should go back to combat practice with Ranald.

Secret Lair (solo)
A revisit to Peaca that is only scary if you are on Hard mode (over 1000 total level). The monsters spawn alone or in pairs and are pathetic shadows of their true selves. On Hard - they ARE their true selves so prep accordingly! :P

Jarlath the Hutt (solo)
Your main objective is to reach the top left castle room on the map. Bring an l-rod to detect the ice mines in your way though. Also there are 3-4 patrolling blinkers all of whom can be avoided by going through the central dining room.

Three Times into the Underground Waterway (solo w/ Leymore, then solo twice)
Again nothing too terrible here and no spiders to eviscerate your friend. Take down those baddies quick regardless though. On your return visit you want to prioritise the alchemists as they can keep summoning golems. God mode and/or Trans as needed. Your third run (Path of the Gods) through the same damned thing will be boring as there are even less monsters spawning, which kinda makes sense since you keep clearing the place out.

Goddess of Light (solo)
You'll meet new bastards here called Daols - like you they are demi-gods. They multi-aggro far and fast, have instinctive reaction (don't open with smash), can see hidden, have high HPs and can use spear of light at will. Even if you think you can take them you won't have the time to (15 mins) so as soon as it begins run to Navin (Neamhain) - you may need to use pets to distract or to move faster.

Coat of Arms (fastest solo)
City mission where you need to collect 6 pieces from 6 separate spawns. Shouldn't be problematic for you now since once again you have space and dragon support on top of everything else. Afterwards you get to run Temple Knights Rundal again, this time with Jenna (who is near immortal) which should make for a relaxing dungeon.

All Out Attack (solo)
The last stand of the alchemists, you'll have so many NPC allies here. If 5 unnamed or 1 named friendly dies you fail, fortunately the enemies are just alchemists (and optional spiders) so it shouldn't be that bad especially if none of them are targetting you! :P Just back-smash them all or final hit or god mode - don't use the dragon though as you'll undoubtedly hit and kill friendlies.

Spoiler! He's not the last of the alchemists either! :P

Wednesday, 1 August 2012

Generation 10 Tips - A Demigod is Born

Welcome to my quick guide for Generation 10! I am assuming you have read through the previous classes at this point which means you already have a good grasp of the majority of the enemies here. You've already survived G9 so you won't find G10 so bad. After the last quest line, the shadow forces are in withdrawal (I assume), but those pesky alchemists are still up to no good. Here are the spots I think may give you grief.

Survivor Rescue (solo)
Welcome to Shadow Tara! Ironically the first things you see will be some of the strongest bastards in this story arc. Those shadow ghosts are highly dangerous and for now it would be wiser to flank and avoid them to reach your destination. You will however need to fight some bone soldiers who are pretty much exactly like their shadow counterparts, so nothing new here.

Lezarro's Book (solo or with royal alch)
Standard fare of killing stuff in orb sections, just stick to the main roads. If you are having problems finding the orbs bring along some arat berries to radar them out until you get used to where they spawn. The boss room features zombie soldiers, who basically are just like the Tir Na Nog zombies. I hope you've been practicing your windmill - if not this could be a difficult fight and you may want to look for a royal alch to help you out. Or better yet, just practice windmill?

Lileas' Honey (solo)
Just want to point out your main target here are the honeycomb trees, not the bad dudes. You don't have to kill any of them.

Jousting Practice
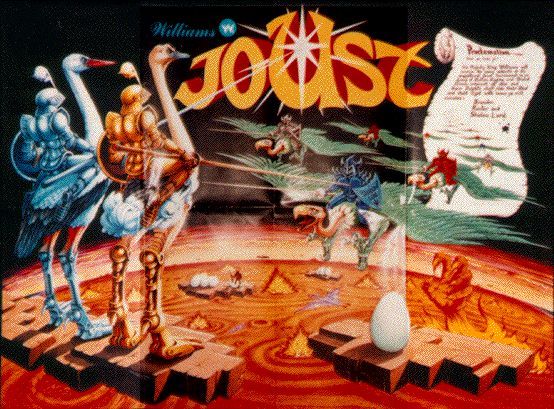
The last bit of a large collection quest has you joust against an NPC in the arena. This is a pretty fun mini-game and it is worth paying the small amount of gold to get used to it even after you've completed this quest. You'll need at least a mid-level proficiency in it (reading NPCs) later on.


It's come a long way huh? :P

Cubic collection (fastest solo)
Getting you exploration up should be easy by now if you've been doing the Cor circuit. When it's time to get the cubic stuff just load up on passes before heading out. Fastest collection is by only doing the first 2-3 rooms, wiping out mimics, then leave and repeat until your collection book is complete.

Third Wheel in Maiz (as Arenren solo then as Voight and Isla - you need a friend)
If you haven't yet gone to get your Final Hit quest (humans) then there's a high chance you've not been in the Maiz Praire ruins before, and you are in for some tough opposition. When doing the 2 player version, Voight will be doing most of the fighting but Isla -MUST- still cover him. Use magic to buy him time to windmill or counter the multi-aggro mobs.

Slates
They behave like goblins but have very high protection (no passive defense though) and even higher damage. Using defense will probably still result in serious injury so windmill, counter, and smash if the opportunity presents itself.

Skeleton Ghost
Generally all ghosts in Mabi are bad news, at least this type has no passive defense. They do dual aggro quick and do very good damage in both melee and magic. Final hit may result in your death if two of them are on you, so you are better off luring one to a free corner and dealing with it the usual windmill, counter way. Be ready to take action if it charges up magic though as it will almost always move in for a melee swipe right after. They can also windmill.

Return to Longa (fastest with party)
Just variations of the critters you fought on your last run through here, the only thing new is the boss at the end - a familiar named alchemist. He tends to just behave like any other alchemist though, with the extra ability of healing to full if he yells "I am immortal!". Makes you wonder why he doesn't just keep doing it. Anyway, if you are solo just turn on trans and wipe the floor with him - get ready for the usual wind/water blast combo. If you have a group, just keep him on the floor so he can't do anything with smash-mill.

Fomor Mata (solo)
The fights to the arena should be nothing new for you, but when you get there your jousting skills will be put to the test against a fomor commander. Fail the joust and you fail the mission. Hope you've been practicing! Win the joust and then you have to beat him on foot. He is pretty much the same as the named commander in the previous story arc only in black armor instead of gold. Look out for his golems and his life drain and remember you can use the entire city to maneuver around if need be. Don't open with a smash as he has instinctive reaction. Poison may be useful against him if you or better yet, a pet has it.

Couracle's Heart Again, because you forgot to pick it up last time (bring full party)
Basically you'll be fighting a zillion baddies you've already fought before - just all at once. To this end bringing a full party is recommended. In the final area you'll be joined by NPCs from Tailltean who once again must survive the encounter. Don't worry, it's not as bad as the "Last Battle" in the previous story arc. Those shadow ghosts you avoided in the first mission will be here again, and this time you'll need to fight them. They have thunder (perhaps your first baddie with adv. magic) which can easily kill anyone and heavy stander so make sure they don't get to cast by standard gang smash-mill. One skilled person can disable the ghost long enough for his buddies to kill the rest then help out. Alternatively 2 should be able to take out a ghost directly by keeping it on its ass.

The only thing in your way is yourself (solo or with royal alch)
Before entering the shadow realm prep a cylinder in one weapon slot and your primary weapon in the other. Also prepare a hotkey for "life drain" even if it is at novice rank and move all your current life drain crystals to the top left of your inventory if you have any. The finale takes place in a very familiar place and has two stages. Your enemy will be using alchemy skills that you can use evasion to dodge plus demi god abilities which are evadable by just running around. Any damage you do to it will hurt you by 50% - but this is not a bad thing. Punch its face once (cylinder equipped) to injure yourself then evade like crazy. After it does the "area" attack (as opposed to the light spear attack) it will taunt you so use the music box to make it go crazy temporarily. As soon as this happens hit your life drain hot key and drain the bastard (if you brought a royal alch this is his job). To proceed to the next stage the life drain must restore you to full health, so you cannot be too injured (unless your life drain skill is unusually high) and not be on full health to start with. If you run out of dark life drain crystals or he kills you, you may as well restart the mission and save any nao stones you were planning on using for stage two.

Second stage has him summon some buddies but now you have the demigod power. Don't be hasty as it doesn't make you invulnerable! Your regen will be much higher now and you should be able to outrun all your enemies, but having HP and Mana pots in reserve is a good idea (you should know to be using mana shield by now). If you followed each story arc then the best thing to do now is stand in a clear side of the circle and call for a dragon strike on those bastards then work on slaying the main guy. He will resummon all his pals if you kill all of them, so if possible leave one or two far away so you can deal with the main baddie in peace. You can then go berserk using your new abilites on your foe to destroy it quicker. Ho ho ho, now you have demi-god mode. :)

Thursday, 26 July 2012

Generation 7 Tips - Can I be a mongoose?

No but you can be an otter! There is no "story" for Generation 4-6 (they were just new areas - Rano, Physis and Connous) and there is no proper "quest" that starts this generation off (its also a new area - Couracle); in-fact you can skip it, but I've always thought skipping stuff is just giving yourself less game content and is generally a stupid thing to do. Here's the quick run through of the problem parts, and as usual, you can find the rest of my classes in the binding post:

Those Effing Fragments
You'll need to get yourself to Couracle in Iria and mark the mana tunnels at Cor and the one nearest Pantay swamp (still kinda far). Remember that if you have no flying mount you can just ride the hippos across the river. Once at the swamp you'll need to use L-rods to excavate chests and bring back fragments (2x2 preferred) to Voight. You are after an ancient sun, snow and lightning fragment and if you have been doing basic exploration AP harvesting then you know how to do this, and that Voight is going to fail on around 30% of your retrieved stuff. Be prepared to spend a lot of time in the swamp hunting for these. Also you will probably run into these during your prolonged stay there:

Giant dragonfly
Like spiders, these only know defense but can multi aggro if you are silly enough to wander into them. They also have low HP making them easy kills, but they are easy enough to avoid.

Hippos
Only found on the Western part of the swamp, these ones have "pig" AI and know defense and counter. They also have heavy stander due to being fat so be careful with normal attacks if you end up fighting one. Usually they'll leave you alone anyway, just don't provoke them.

Swamp Cobra
Has your standard snake AI (with smash) but is possibly the first critter you've encountered that has poison. Poison in mabi is very bad in that it does a percentage damage based on how many HP the victim still has. It won't kill you but it will get you to 1 HP pretty quick. For this reason if you have to fight these, kill them fast and don't let them bite you!

Gator
Aggressive sharp-toothed lizards that like hiding in the swampy water. They aggro pretty quick, enjoy smashing, and do high levels of damage. Of all the swamp critters, these are the ones you will probably end up fighting most during this section. They will easily outrun you so fight well and bring bandages to recover from any injury (black) damage  they do.

Hobgoblins
Can pop out in pairs when you find chests. If they are exorcists then you can probably try take em out. Just treat them as goblins with magic, nothing really special. However if head hobgoblins appear I suggest you run. They have high levels of stander, high hp, fast multi aggro and do lots of damage making killing them before they and chestdespawn a bit of a challenge. Fortunately they only run as fast as you (human speed) so it should be easy, and probably less time consuming, to escape.

Row, Row, Row your Boat
Once you have all three you'll need to visit the temples at the bottom of Erkey falls. The only way to get there with out help is by rafting, so make your way up to the La Terra Highlands with 10 pieces of firewood and you can talk to the native up there to build your raft. Bringing sufficient pots to stay alive is also a good idea as you will be attacked by hobgoblins on your trip down river. If you have it, you can use advanced magic or high rank crash shot to blow away the opposition on the banks as you pass but otherwise just transform and make sure to steer the raft to the RIGHT at the junction or you'll have to do it again. Once you've made the turn, steer left to avoid docking (unless you want to get off at the hobgoblin village but you may lose your raft) and fall down the waterfall. The cutscenes here lag sometimes so just be patient and wait them out. Once down there it should be safe enough to do what you need to do. If the giant alligator is awake, it may be best to avoid it for now. :P

As a side note, Rafting is another way to gain exploration exp and is quicker (but obviously more dangerous) than doing the Cor circuit if you can kill lots of hobgoblins during each run.

Longa Otter - (as Ruwai)
The highlight of this story arc, Ruwai is pretty kickass for an otter. Use more of his normal attacks instead of smash as he can chain a long set of them and you should get past all the scum of this desert dungeon in no time.

Mirror Mirror (need a giant)
If you aren't a giant, you're going to need one to help you get through the Par Dungeon part of this arc. While there are "ice" or "snow" variants of things you should be familiar with, there are a few new enemies as well:

Shrieker
Floating ice heads that behave like wisps, though they favor ice bolt. Remember how to kill a wisp? Same thing here.

Bandersnatch
Almost the same as zombies, except on the lower floors they can sprint at you and do pretty good damage. They have low HPs though which makes a giant's stomp the ideal way to neutralize them. Windmill works too, but the most widely accepted method is firebolt revolver to keep them at bay.

Wendigo
Treat is as a fit ogre that has higher defense against ranged and magic. The wendigo must die a specific death for the mirror witch to appear - it must be slain by a giant wielding an ice pole, and ice poles (if you don't have one) only drop when the wendigo uses stomp. Your main problem will be keeping this creep alive for your giant to bash as by this point, you will probably be able to dust him in short order if you aren't careful. To be safe, let your giant buddy solo him.

Mirror witch
She has many dangerous powers and broad array of defenses but she can't use any of them if she's pinned on the floor. Safest way to fight her is seriously to gang smash/windmill her. That may sound kinky but you'd better do it or it is you that will be raped. :P

Don't be fooled by her hotness, she's as cold as ice.


Longa Hide and Seek - (as Atrata)
The anti-climactic final dungeon - Atrata has no hope in fighting anything in here so just get used to using the "hide" action that is available to all elves as you hit those orbs. Remember it drains mana so drink up when you are running low.
Monday, 23 July 2012

Generation 3 Tips - Holy Hell

Now that you have gained your transformation from the previous story arc this should be a breeze right? Well, yes and no. Generation 3 has two parts, the first being quite easy but very annoying due to running to Tarlach often, then the end game which is ridicoulously hard.

Statue Restoration
First part mainly involves fixing up statues that the fomors are breaking as you mostly revisit dungeons you've already beaten. I'll just quickly cover some opponents that may be new to you at this point.

Arr' they be Pirates!
The pirate skelies in Rundal are the same as normal skelies, only that differently attired ones can multi aggro you. Keep this in mind as you take them out.

Heavy Hitters
The Rundal Cyclops and Barri Ogre Warriors (one of whom you have fought before) have similar AI. Probably a good idea to use transformation against them just to be sure, or if you want to be extra safe, pet revolver at your leisure. Obviously don't fight the Ogre Warriors all at once and be warned that the big ones have more HP and deal more damage.

Rabbie Bosses
If you open the boss room while alone in Rabbie you'll face a succubus, an AI you have defeated before as Tarlach in Generation 1 and has similar AI to the necromancer at the end of Generation 2. Also good to note, she only runs as fast as you making it easy to smash and run until she decides to give up and repeat. If you open the boss room with a team you will be lured into a trap by a single goblin. Killing it will spawn a large cluster of stronger multi-aggro gold types with archer backup. If you can snipe or pet revolver the "bait" goblin, you will be able to handle the army that follows in a more organized fashion.

Random Math
There's a low chance you may encounter either of these while clearing Math - Pocket mice and Giant Skelies. The later ones are actually the least dangerous skeleton type and are best dealt with windmill since you can hit all of them with their large hit boxes. The pocket mice are just slightly better than rats, and so long as you don't use magic on them will pose no threat.

Baol Infiltration
Here's where things begin getting insane. This solo dungeon is designed as a "stealth" mission where you need to get past a whole bunch of high damage dealing guards to reach the boss room. You can't use magic other than healing and if you talk the guards will detect you. Every single door is locked via orb system which means being unlucky could result in your death. Fortunately you get an anti-fomor robe for the duration of this which enables you to be invisible from all guards except the hell hound type, but if THEY detect you - ALL of them detect you. This makes them your most major threat. There are many strategies to get through safetly on the wiki. I recommend using the rock throw action and bringing a long bow to lure the hell hounds out from certain multi-aggro death should they appear. It is important to wait for their bodies to disappear before continuing as even "dead" hounds can detect you and alert the other guards.

Alternatively if you are high level enough (R1 smash and combat mastery) and have a strong mana shield to back you up, you can simply kill all the guards. Elves have an even easier time as they should be able to "hide" in between hitting orbs. Be warned that the hounds aggro very fast though so it may pay to get behind the orb before kicking it.

Baol Final (better bring help)
With a mix of boss type creatures with multi aggro in every room for SIX floors, this is possibly the second most difficult dungeon in the entire game (after Peaca) you'd really better bring (preferably strong) help. Also be sure to bring firewood, bow and arrows and 100 HP potions ONLY. Picking up or bringing any of the lesser heals WILL get you killed later. You'll most likely need a bunch of party feathers and a friend outside with advanced feathers should all of you get killed. If your team all have high ranked windmill then over-lapping WMs can help a lot. There are a bunch of new opponents here for those who haven't been running other dungeons prior to this.

Giant Worms
A variety of giant worms are down here and they have brick loads of heavy stander and mana shield. Best dealt with by a high level archer. They will never aggro first, so if you need a breather in between a wave try to not to disturb one of them.

They are ugly bastards but they won't attack unless provoked!

Nightmare Humanoid
Same as the boss in the Paladin's Passive Defense quest, just lots more of them! Remember to firebolt them to make them change color as melee is ineffective if they are Red or White.

Argos and Giant Headless
Just like ogre warriors, only uglier. They both have heavy stander and while Argos' have mana deflector, the Headlesses are almost immune to arrows. If you are keeping one dude back in the previous chamber as your resser with party feathers, make sure he keeps well away from the combat room as they have attacks that can still go through to adjacent chambers.

Dark Lord and Dragon
No need to fight the Dark Lord this time, just stay away from him and his pal until the dragon shows up. Once it does you'd best put down a campfire or two to provide cover from its fire breath. Hopefully you also have a full stack or two of heal pots and bandaged all your wounds prior to entering. Last time I fought him he couldn't do injury (black) damage but could wipe out your health in one shot. If you are at full health before this happens you'll go into Deadly which gives you time to drink up again. Arrow revolver or just plain ranged attacks by the campfire provide the best way to destroy the dragon (aside from demi-god powers you will get later) as you can hit him even while he is flying. Note, the campfire blocks the explosion so you must be standing opposite to where the breath attack *lands* as opposed to opposite the dragon itself as he can toss it anywhere when he is flying!

Obsidian Enchant
Ideally you still have the "goddess" weapon from G1. If that's the case, you are best off stacking this reward scroll on that item. :)

Monday, 16 July 2012

If I were a Rich Man

My sixth Mabinogi lesson! To find what other classes are available please see the binding post. :)

You are Gold!
Gold is the main currency in Erinn and it will come to you from all the previous methods[link] (other than aging and rebirth) as well as from slaying critters and opening treasure chests. Note that your Luck stat can affect how much gold appears in both those cases. You can also make gold by selling goods to other players - it will require a paid account to setup a shop in town, but it is free if you are advertising via party sign or the trade forums on your chosen server.

Fomor Scrolls and Hunting Quests
Collecting 10 fomor scrolls can earn you some extra gold, as can hunting quests that are available from a few npcs - though those tend to eat up a bit of space. Scrolls that you should always collect are: mimic, skeleton wolf, and metal skeleton (while doing g1 anyway). There are many others, but which to collect depends where you most often hunt.

Ferghus
Cheap repair can save you a ton of gold later, even better is if you use gear that is cheap to repair especially when starting out. Wooden blades are very good for this purpose and pretty easy to come by so you won't mind if Ferghus breaks them from time to time. ;)

Farming
Another way to make a decent profit is by renting a farm at Taillteann. Blatt the farmer has 90 plots per channel (remember where yours is) on offer which cost 30,000 gold to rent for a week plus 500 gold for whatever type of seed you decide to grow. I suggest tomatoes for your first run as they are the easiest to manage and even if you somehow stuff it up by performing very few actions (of the 10 you are allowed to do per real day) you should still at least double your investment. When I was doing it I was making around 220,000 per week, and that was with a lot of competition (less people are farming these days). Given that your bank account funds are shared between your characters it is an idea to have one of your mules tending to it once every 20/30/40 minutes (depending on your last action) while you continue to build your main for the majority of your play time, rather than having him constantly hop back to the farm to "poke" it himself.

Currency of the L33t
While fomors carry gold it is not actually their main currency - they use it to distract a large, gold eating monster you will encounter a few times in the game. Instead, they trade with Ducats and now that some of them are "good", will happily trade them with you too! They can be used to buy some pretty nice things but the catch is, unlike gold - it cannot be traded amongst players and can, as of this post, be earned in one of two ways. For a newbie though I do not recommend either till you are confident in your combat ability.

Merchanting
Moving goods from between trading posts is the main method of earning ducats. As a bonus you also get gold and exp for successful runs. Your first few thousand ducats are often best spent purchasing cargo carrying options from the travel ogre as they will always pay themselves off rather quickly. The main problem with this is that while doing this you become a target for bandits and, given that you will be at 50% combat efficiency when moving goods and will almost always face a multi-aggro situation, it could be a painful experience. I recommend moving as a group to at least have support especially when bringing elephant-loads of goods. Some people even offer their services as caravan guards - a good idea on some routes. Remember too that trade between Dunbarton, Cobh, Belvast and Scathach Beach will yield zero profit so you can't rely on the safety blanket there.

Bandit Hunting
This is for veteran players only - the bandits they will be facing will always be of veteran or master level and the bandit bosses themselves are quite overpowered (stronger than some generation bosses) and can only be faced one on one. Best to avoid this until you are sure you can take them on.

Secrets to NX
Not really in-game currency but Nexon Cash is sometimes the only way to get useful things such as pets or spirit weapon repair potions. If you are a cheapskate like me and don't want to spend real money getting NX there are still other ways available to you. Obviously being "gifted" NX by someone else is nice, but Nexon often offers free methods to earn NX via watching trailers, filling out surveys, winning competitions, and random lucky picks. Keep your eyes open on their main page and forums for these opportunities.

My kingdom for a Horse
I cannot stress enough how useful having a pet is. If/when you get your hands on some NX they are perhaps the first thing to spend on. Make sure you research first into what you need! Do you need to speed up transportation? Need more inventory space? Or just want something that can kick butt? Most people go for a mount first. I went with a minibear because I didn't mind to jog everywhere nor need lots of space. Regardless of what you get, you should train / level up your pet ASAP. Fastest way would probably be with help at the black mongeese again, but remember you should be playing -as- the pet yourself to reap the most benefits (with or without help). While playing as your pet you will also no longer see enemy skills. This is good training for you (the gamer) too, to read your opponents without relying on that bubble.

Furthermore once you start using your pet in combat you should optimize its AI to better suit its role. Not a coder? Don't worry, there are many kits already setup out there for you to cut and paste - just have to find them. This is the one I use and in one on one melee, my bear now rarely loses so I can just send it off and not worry about it as it will take care of itself. For the record, it still does more damage than my higher level thunder dragon. ;p

Thursday, 12 July 2012

Gearing Up

My third Mabinogi lesson! To find what other classes are available please see the binding post. :)

At some point you will ask what is the best gear available to my character, and the answer really lies in the character itself. You start off with a pretty decent basic weapon depending on your race that has very low repair fees. I suggest hanging onto them as long as you can because no other weapon will be as cost-effective. If you were given an Eiry, then she is also a decent weapon but she will be taken from you sooner rather than later. For newbie humans I recommend moving onto dual wooden blades (or wooden blade/practice short sword) then eventually bastard swords or gladius/gladii (if you can afford it). Elves you will eventually need a long bow for decent range while giants will want to swap for dual blunts or a lance and shield combo later to play to their strengths.

Most equipment can be modified as it gains proficiency to be better tailored to suit your needs so you should upgrade and enchant your gear to what you can best use and afford, and this will probably take some researching on the wiki to suit your character and taste. As an example I still carry around a pair of plain 222 broadswords whose stats are as follows:

Attack: 0 - 73
Critical: 30%
Balance: 21%
Durability: 7

Balance is the important stat here as it dictates what range the damage will be most of the time. For melee and ranged weapons this maxes out at 80%, which my character surpasses easily with his high dexterity (every 4 points of Dex gives 1% balance), Combat Mastery (Rank 1 gives 15%) and Sword Mastery (Rank 1 gives 15%). Without taking strength or anything else into consideration, I would do around 58 points (give or take) damage per hit. The same sword given to a clumsy (1 dex), and untrained newbie (no mastery) and he would be doing around 15 points of damage per hit. For him it would be a totally inefficient weapon, so be smart when upgrading your gear.

Also available are ego weapons. Imbued with a spirit (a cute, violent one) it will, over time, turn a stock standard weapon into a very powerful tool of destruction. As such, you can have only one (at a time). It will cost you though - either with time, gold or real money. The stronger the weapon gets, the faster it gets hungry and the more it will want expensive stuff. It also cannot be "blessed", which means it will deteriorate at the standard rate. Keep this in mind before you ego a small dagger that needs to swing lots of times.


Don't be afraid to use this.

Armor and clothing on the other hand is pretty much just a matter of taste. There's a fair bit of variety out there so it just comes down to what you like and what you can afford.

What do I carry?
Currently a pair of 222 broadswords, a kite shield (for times I really need to parry or charge) and an ego longbow who I only pull out when the situation calls for it (which is becoming more and more common with the dungeons I run). I started out with twin wooden blades though, then moved up to dual bastard swords before getting enough dex to use the modified broadswords. I like being cheap. I also carry over a dozen potions that I make myself because I don't like dying. ;p

Wednesday, 11 July 2012

Off to the Races

My second Mabinogi lesson! To find what other classes are available please see the binding post. :)

As of this post, everyone can get a free elf AND giant character card. All you have to do is reach their home cities on the Iria continent. I suppose a quick comparison of the available races is a good thing to add here:

Humans - runs the slowest but are the most versatile skill-wise. Can dual wield swords. They also have the widest array of gear that they can equip. They are my preferred race.

Giants - runs faster than humans and are geared more close quarters combat. Can dual wield blunts. They are weaker at magic and have almost no range capabilites though, and have the least amount of equippable gear.

Elves - runs faster than giants and are geared more for ranged combat. Can shoot while mounted and can hide from enemies. They are the weakest at melee.

If you started in Uladh and want to cross over quickly just go to Actions -> Continent Warp and pick Iria. If you started in Iria then I think you have to complete some basic exploration tasks before it lets you out into Qilla Camp proper. Remember to not have anything in your hands to "collect" artifacts from pillars, other than that it should be pretty straight forward. Once you are out of the tutorial zone you'll find yourself at Qilla Base camp and can begin your run to the race of your choice. You can only get the other free character 24 hours after you get the first one.

Easiest way to reach either city is if you have friends or make friends or even just ask strangers really nicely if they can give you a lift through a mana tunnel to either/both cities. If you are very anti-social or unlucky, then you'll have to reach them on your own. It is a good idea to "tap" the Mana tunnel a short distance from Qilla Base camp (to the West) during the day when it is open to provide an easier return trip too.

To reach the Elf city of Filia, you'll need to run East (that's turn right) when you exit Qilla Base camp and hug the mountains till you find a way across to the desert. Cross that and just keep running through the Karu forest, across a bridge, and then across another huge, sand-stormy desert.  Once you get to Filia, find their leader - Castanea, she's towards the back of the town and ask her about "elf/giant alliance" to get your free card.

To reach the Giant city of Vales, you'll need to run North West (turn left) when you exit Qilla Base camp and hug the mountains till you find a small valley that leads into the Nubes mountains and eventually down into the Solea Caves. Your mini-map will not be helpful down there but it is still straight forward to traverse. Just follow the left cave wall and make sure you run through any cave walls that can be opened (easy to identify via mouse cursor). You'll pop out on a clearing then dive into another cave system. Same thing, just follow the left wall. Eventually you'll come out on the snowfields and from there is a straight forward run to Vales to talk to their King, Krug about "elf/giant alliance" to get your free card. Obviously if you ever need to run those caves from Vales to Qilla, just follow the right wall.


They hate each other so much they want to make babies.

If you are running to either do not stop for anything and try avoid all the monsters you see. The trip will take you about 40 minutes either way, possibly slightly longer to Vales due to the cave system. Near each town should be another mana tunnel that is open during the day. "Tap" these to mark them on your map. You can then travel between the ones your character knows about as much as you like when the tunnels are open. On the Uladh continent the moon gates work very much the same way, only at night.

A good side quest for you new players to do when bored (like there's not enough to do :P) is to mark every single moon gate and every single mana tunnel you can get to (each town has one nearby and the tunnels in Iria show up on your mini map). While there is no combat involved there is a lot of leg work. Your reward will be ease of travel later on, coupled with being able to see the vast landscapes in the world of Erinn. :)