To recap you've already done the Normal version of R4A2, have the second CRYO objective just meters from extraction and have unlocked the Extreme bulkhead. Head back to the drop room for navigational purposes then just go one room North. The bulkhead you unlocked is against the West wall. Feel free to open it as there is no scan or alarm but before going in make sure to use a terminal to query your new HSU objective to find out where it is (it moves around per game). Clear the sleepers as usual (oooh lots of them), keeping an eye out for ANOTHER bulkhead key. Once you have it, plug it in to the next key slot which you would have walked past while searching and then you can decide to unlock the next Extreme bulkhead or the optional Overload bulkhead. Yeah, not touching Overload right now thanks. :P
This second bulkhead has a class II cluster alarm which is one set of many little yellow circles that are easy to clear. Prep before starting, and of the two big doors leading into the chamber the horde will rush through the further one - not the one next to the Extreme bulkhead. Foam, mine and autosentry as usual. Once open you will find a massive intersection chamber with another scout. We just opted to snipe and fight the room again, this time holding the "dipped" lower ground in the room before, with a mine in front and behind and the autosentry covering the space beside the mining vehicle.
Inside the intersection chamber you will find doors leading to zones 110, 111, and 112. You only need to open the one where your HSU objective is! Now, all the doors require power first and there's one power cell already available so just read which generator your door requires and plug it in. Note: its not always the one nearest to your door and you cannot unplug a power cell once it has been placed so don't screw it up. Now for a challenge. Whichever door you power up will have a class III cluster alarm - two sets of what you just did before, with some possibly going upstairs in the central chamber. This time, you have no door to hold them back - just a door way. Luckily they will all be coming from one direction so we put the autosentry facing it and five mines to back it up. Also, after a few circles DL went to support the autosentry which bought Jim and I enough time to finish the security scan.
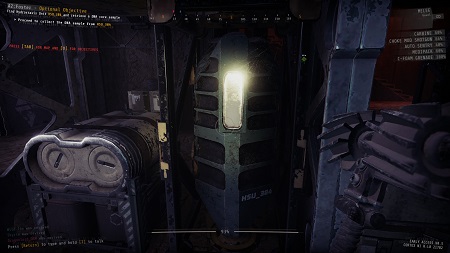
Past the security door is another scout but if you are lucky he'll be in a room you don't need to go to. Clear as usual until you find the HSU and STOP, DON'T TOUCH IT! Now is a good time to practice the run back to the extraction point, especially that tricky U turn near the very fist bulkhead that took Jim awhile to get used to. Setup defenses at the extraction point: autoturret facing out from the circle and mine and foam the doors on the wings. Remember the path? Good. Head back to the HSU with the entire team because you all need to do a single security circle while extracting the DNA. At least one wave of scum will show up before it finishes so kill them and together as a unit, head to the extraction spot. The waves will continue coming from this point on so don't delay.
Once you get to the extraction room, shut the door behind you (make sure no one is caught outside) and if anyone has a cfoam grenade like DL did, ice the door too. Pick up the CRYO thing you left here and drag it and everyone else to the extraction circle for a -really slow- scan. Literal armies will be coming for you now including giants so fight well and hold your ground. Doesn't matter if it looks like you are about to be overwhelmed because at 100% you GTFO and win! As a bonus, by doing this you will now have unlocked floor C. :D

No comments:
Post a Comment